Build Help Tutorial
![]()
Welcome to the ultimate Build Tutorial.
| An expansive collection of tutorials leading you through the more complex tasks of Building levels. Tons of Build screen shots, and clear step-by-step instructions. |
| The complete Sector Effector Reference Guide, taken right out of Buildhlp, with a few corrections and additions. Contains links to tutorial pages. |
| The complete Sector Tag Reference Guide, taken right out of Buildhlp, with a few corrections and additions. Contains links to tutorial pages. |
| The complete Special Sprite Reference Guide, taken right out of Buildhlp, with a few corrections and key additions. Contains links to tutorial pages. |
| A nearly complete listing of the keyboard commands used in Build. Contains many that are not documented. Original doc came from Buildhlp. |
Hello, and welcome to my Duke3D tutorial. When I first installed the shareware version of Duke and played the eight levels, I was astonished at the level of detail put into each level and the truly revolutionary things that were being done to the 3D first-person gaming genre. To my great pleasure, I read in gaming magazines and the closing screen shots of Duke about the free level editor they were going to be shipping with the registered version and the commercial CD.
Within days of its release, I ran out and purchased the game and immediately began playing with the editor; here on out referred to as Build. Unlike most other editors I've used with games such as Doom, this was a complete breakthrough in ease of use. Setting textures, sprites, & ceiling/floor heights was so easy I had to pinch myself to make sure I wasn't dreaming. Many kudos to the programming prowess of Ken Silverman, the brain behind the 3D engine used in Duke and the creator of this Build program.
Life isn't always perfect, I've found, and my early euphoria turned into frustration as I meddled with the editor and help files included with it. I couldn't manage to figure anything out those first few days, and the help files were much less than that. The program BuildHLP, which is included with the whole Build tools set, is good for laying out the basic details of level design; making sectors, splitting them, joining them, inserting sprites, and the like. What they failed to include was how to create the more advanced features; sliding doors, rotating sectors, subways, etc. They listed out the different Sector Effectors and what they did, but nothing as far as how to implement them, or how the sectors should be laid out.
I'm assuming in all of my tutorial pages that you've read the BuildHLP files and know how to make sectors, set ceiling/floor heights, insert sprites, change sprite tiles to Sector Effectors, and the common Build tasks. In certain places, I've pointed out how to accomplish a certain task in case it wasn't mentioned in the help files, or if the help files were simply wrong. The most frustrating error I came across early was how to make a sector within another sector. The help files say to hit ALT-Insert on the inner sector. This key combination duplicates sprites, unrelated to sectors. The real combination is ALT-S.
I decided early on in my quest to solve these puzzles that no one should have to struggle through making interesting and challenging levels for this awesome game. I spent many nights taking apart other levels to see how they, the level lords at 3DRealms, made their trick levels. Even then, the levels were so intricately laid out it was hard to discern the multitude of sprites overflowing my screen. And then I found the perfect maps. In the Build directory of your CD, there are two maps included with the editor. They are _SE.MAP and _ST.MAP. These two maps include every possible thing you can do with sectors. I tore them apart like a dog with a rag doll. Now everything seemed to fall into place.
There are many little tricks you need to know in order to make your levels appear seamless, and natural. What looks like a single line on a sample map may in fact be two, three, or even more lines layered on top of each other. The Build program is half 2D and half 3D. The 2D half can get quite confusing when sectors are layered over sectors (a very crucial effect when planning multi-floored levels.) Unfortunately, we can't spend all of our time in 3d mode.
Before you begin your very rewarding and challenging quest to make the ultimate levels, please heed some advice. Save your work often. On my 486 at home, the Build program frequently dumps me entirely from the editor when switching between 2D and 3D mode, taking with it the changes to my level I just spent twenty minutes on. I've gotten so used to it now that I simply save my work before I even switch over to 3D mode. If you have a relatively slower box, like a 486, I recommend highly that you save your work frequently. Make numerous backups of your level, ie naming copies like mylevel1.map", "mylevel2.map" so that you have some history as your level progresses. If something goes terribly wrong, you have the last stage still on hand to revert to.
Acknowledgments:
I'd like to thank the following people for assisting me in level design, page layouts, and neat little tricks: Don Rogers, & John "Kasai" Leonard.
Contributing Authors:
The following people have contributed to the tutorial: Jean-Francois Groleau (jfgrol@ ) and Adam Ashley (adam_ashley@ ). Our goal is to make the best tutorial available; many thanks go to them for their excellent work.
If you've come across a neat effect, find an error in my page(s), have a suggestion for the layout, wrote a description on how to do something not listed here, or any undocumented information at all to do with the Build level editor, please send me a note, at ty@ . I'll include your name here under acknowledgments and on any page I've created discussing your findings. I've still got some topics untouched right at the moment; I simply haven't had enough time to write out the tutorial. I look forward to hearing from people as they come across neat tricks and little caveats, so that we can share with the rest of the level makers out there. If you've found these pages useful, or informative, I'd love to hear about that too.<g>
Good luck, and happy level-editing :)
Ty Matthews
If you feel compelled to send me funds for all this hard work <g>:
Ty Matthews
Definition: SectorEffectors
| Sector Effectors are used to create game effects and manipulate Sector Attributes. The SE is the main tool to create effects such as Earthquakes, Explosions, and Lighting Effects. SE are tile #1. |
Definition: MasterSwitch Sprite
| The MasterSwitch sprite is used to activate a Sector Lotag or a Sector Effector sprite after a time delay. This can only be activated by a Touchplate sprite. Set the hitag to the appropriate time delay. Tile #8. |  |
Definition: Touchplate Sprite
| The Touchplate sprite will activate an Activator or a MasterSwitch sprite when the player walks on the sector floor. Tile #3. |
Use [L] to toggle grid-locking on/off. The crosshair is red
when grid-locking is on, white when off.
Definition: Locator Sprites
| Locator sprites are used to define a track for a Subway or to define a path for PigCop Recon Cars, but not both in the same map. You can only have one path in a map. Tile #6. |
Definition: MusicAndSFX Sprite
| MusicAndSFX sprites can be used in 3
ways:
1. Activation sound 2. Ambiente Sound 3. Echo Effect
See the Special Sprite Reference Guide for more details. Tile #5. |
Definition: Activator Sprite
| Activator sprites are used with Switches or the Touchplate sprite to activate the Sector Lotag function or any Sector Effectors within the Sector. Tile #2 |
To set the angle of a sprite, use the [<] and [>] keys in either 2d or 3d mode.
To set the shade value, point at the sprite in 3d mode and use the [-] and [+] keys. Alternately, you can hit ['] - [S] to enter a specific number.
Definition: GPSpeed Sprite
| The GPSpeed Sprite is used to define the rate of movement for such things as Doors, Rotating Sectors, etc. Tile #10. |
Vertices are the points at which sector lines are drawn. They are automatically inserted when creating a sector. To insert a vertice on an existing line, use [INSERT] in 2d mode. To delete a vertice, drag it onto a vertice that shares the same line.
To set parallaxed floors or ceilings, point at the tile in 3d mode and hit [P].
Start out making a single room, with a 3x1 unit window and window sill.
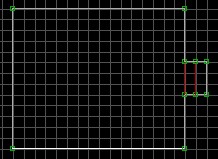
Insert two sprites, a viewscreen sprite (tile #502) and a camera sprite (tile #621.) Put the viewscreen sprite flat against the window's wall. Put the camera in one corner, and raise it to the ceiling. Change the viewscreen's hitag to 1, and set the camera's lotag to 1. The viewscreen will show all cameras whose lotags match its hitag. Set the camera angle to point towards the middle of the room. Set the camera's hitag to 256. This will be our camera's turning radius; see the notes the bottom for an explanation.
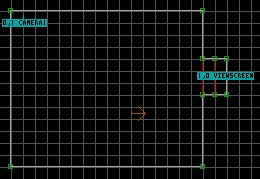

That's all you need to make the camera work, but we want to make a fancier security screen. We made a separate window sill earlier, and now it's going to come into play. Change the height of the sector containing your viewscreen so you can see the window sill "step." While pointing at this step in 3d mode, hit [M] to make it a maskwall. A tile will fill the space between the floor and ceiling. Point at this "wall" and change its tile to a forcefield (tile #663). While still pointing at the wall, hit [B] and then 'H' to make it blocking and masking, respectively. Switch back to 2d mode, turn off grid-lock, and move the window sill corners and window corners right up next to the wall. Switch back to 3d mode and adjust the window sill height to match that of the window. Now you've got a nice-looking screen that is recessed into the wall. Switch to 2d mode finally, and make the window sill blocking using the [B] key to prevent Duke from getting hurt when he views the security screen.

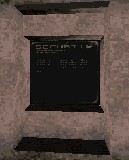
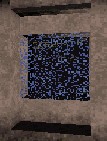
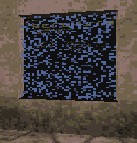

Now you probably want to change the angle the camera points to... up or down. The angle of the camera is determined by the shade value of the sprite itself. The shade value of any sprite is between -128 and +127. The positive shade values will force the camera to point upwards, as high as 127 degrees. The negative shade values will force the camera to point downwards, as low as 128 degrees. To set the shade of our camera, switch to 3d mode, point at the sprite, hold down the ['] key, and hit [S].
There's a little catch with entering negative numbers within Build. It just won't allow you to enter them if the negative sign isn't already there. To set the negative values, you have to enter positive values greater than 127. If you enter 128, the shade (which becomes the angle in our case) suddenly is equal to -128. You can go as high as 255, which is -1. So, to sum up, to have the camera point downwards, subtract the desired angle from 256, and enter that positive value.
Please note that the pan angle of travel of the
camera is, as stated above, set by the camera's hitag value. These values span from 0 (for a fixed camera,) to 2048 (a complete
360 degree turn.) It is also important to remember that this value represents the
angle panned on either side of the pointing angle of the sprite. So if you assign it a
value of 512 (1/4 of 2048), for example, it will describe an arc of 90 degrees on the left
and right side of the camera's axis for a total arc of 180 degrees. Although the use of
exact divisions of 2048 is not absolutely necessary, it guarantees trouble-free operation.
Small uneven values like 90 tend to make the cameras operate erratically. Experiment and
see what works best for you.
Start out making two sectors, one inside the other, and fairly long. Switch to 3d mode and raise the floor height of the inner-island sector above the outer sector.
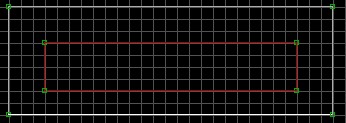
Insert a SectorEffector within the island sector. Change the SE lotag to 24. Change the angle of the SE-24 to the direction you want the belt to move. Switch over to 3d mode and make the floor of the inner sector Relatively Aligned. To set the Relative Alignment, point the crosshair at the floor tile and hit [R].

You can set the hitag equal to a switches' lotag to turn the conveyor belt on and off. Just set the lotag to some unique switch number and set the hitag of your SE-24 to the same number.
Make one large sector that will be our outside area.
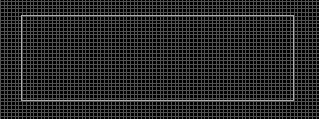
Place 9 Locator Sprites within our large sector. Place for now a single Recon Monster Sprite (tile #1960) in the mix as well. Arrange the Locators in a circle and change their lotags in numerical sequence starting from 0 (which won't require a change) up to 8, making sure not to skip any
digit. The Recon cars will cross each Locator in sequence. This is very similar to Subways. Recon cars cannot, however, stop at any given point. They stop on their own during the game. Take and move the Locators out to the edges of your sector in an oval pattern.
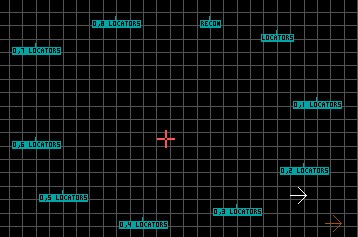
The Recon car hitag should be set to the first locator lotag that it will cross. In this case, our Recon car is right next to the first locator, or locator #0, thus requiring no change to the tags. You can have as many Recon cars as you like in the game; just note that sometimes two cars will stop to shoot at you and may then occupy the same space, following each other around. Switch to 3d mode and move our Recon car up in the air. Clicking and holding the left mouse button on the sprite really helps here. Move all of the Locator sprites to the air as well, mixing up the altitude to give the cars some up and down motion.
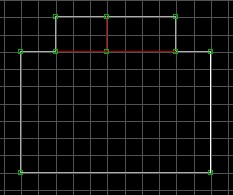
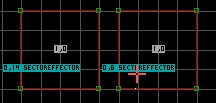
Make one sector about 10x7 in size. Insert two vertices on the top line and draw another sector right above our first sector. Insert another two vertices, this time in the middle of the top two lines (we're going to split the top sector.) Split the top sector by drawing a line between the two points you just inserted. Your map should look like this picture. It's crucial that you split the top sector and not try to make each half separately. I've found doing the latter causes weird problems.
Insert two Sector Effectors, one in each half of the top sector. Change the SE lotags to 13. Change the two SE hitags to 1, or any unused SE-13 number. Insert four sprites, two in each sector, and change the sprite tile to SeeNine (get it? C-9? :). The SeeNine sprite is tile number 1247. Change all four SeeNine hitags to 1, or the number you assigned to the SE-13. The SeeNine lotag is set to the amount of time delay you want the explosions to occur after you've hit the crack with an explosion of its own. Here, I've spread the time delay around, making values 20, 40, 60, and 80 so that the explosion will appear to travel across the two sectors.

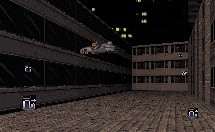
Switch over to 3d mode and insert a sprite on the wall above the two sectors. I've also set tiles and floor/ceiling heights/slopes to something that resembles a gaping hole in a wall after an explosion. Set the sprite's tile to tile number 546 (crack). Move the crack down (pgup/pgdn on the sprite) so that it floats in mid-air, positioned in the middle of the hole. The crack can be anywhere at all in the game, but we want it to be fairly close to where the explosion will occur. When the game is run, this crack will appear against a solid wall. The solid wall is created by the SE-13, which tells the game to put both ceiling and floor at the same height at the start of the level. Switch back over to 2d mode and set the crack's hitag to 1, or the number you have been assigning to the SE-13 hitag.
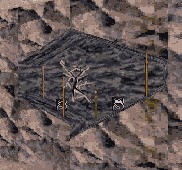
When an explosion hits this crack, the sectors will move to the positions they had in Build, and the C-9 explosives will burst in sequence. You can make only the ceiling or floor match the height of the SE sprite by changing the angle of the SE-13 to pointing down. By default the angle points up, which makes the game put both ceiling and floor at the same height/slope, so that our hole will not exist.
The hole does not have to be caused only by a crack. To have another "exploding" sprite (ie other C-9s or the Fire Extinguisher Sprite) cause the hole to explode, set the sprite's hitag to the same number you gave the SE-13 hitag.
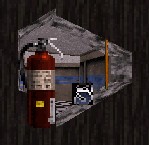
You can have the hole explode when Duke walks across the floor, as well. Insert a Touchplate sprite in any sector which Duke will walk across. Set the Touchplate's lotag to the same number you gave the SE-13 hitag.
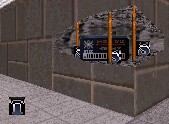
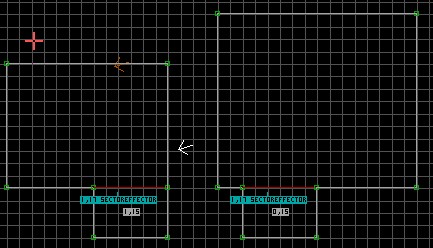
Start out making two separate sectors. In the left-most sector, create a little circular sector that is valid player space; this will be your source sector. In the right-most sector, create a void-space area that is larger than the circular sector in your source sector.

Now make a copy of the small circular sector. Do this by pointing your mouse crosshair a little bit above and to the left of the circular sector and pressing [right-alt]. Keep the right-alt button down, and drag your mouse down and across the circular sector. You'll see a green-bordered box form. Once you've totally enclosed the circular sector within the green box, let go of the right-alt button. Now that entire sector will begin to flash green. Point your mouse crosshair anywhere in the middle of the highlighted sector. Be careful in the next few steps and avoid moving the sector. While holding the mouse in a constant position, press and hold the left-mouse button.
What we've done here is highlight the sector and any sprites within it for moving. But there's a handy tool built into the Build engine, and that's the ability to copy. While keeping the left-mouse button down and not moving the sector at all, press insert once, but do not let go of the left-mouse button. Be sure the sector lines up with its original coordinates. If you play around with this at all on a test map, you'll see as you move that sector out before pressing insert, white lines will replace the original red ones. Don't worry if that happens to you, just move it back in place and you'll be fine. Now that you've copied the sector into its original location (sounds weird, doesn't it,) you can safely move it around for placement elsewhere. So we'll move it to our void-space area in the right-most sector.
You can now do one of two things here. Either a) drop the sector by letting go of the left-mouse button, or b) press insert again to make another copy. We're only going to make a single copy, so let's drop the sector in that void space area. Press the right-alt button again to disengage the highlight, and we've finished the move.
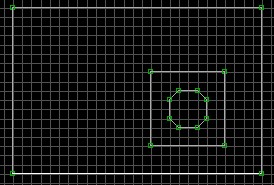
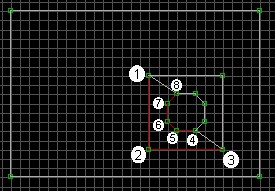
We must now meld that copied sector into its bigger, surrounding sector. This is what we created that void-space sector for. If you tried to just plop down that copy in the middle of the existing sector, you'd get many, many strange effects, and probably lock the game. It's a cardinal sin in Build to have one sector cross red lines with another, and the same holds true for copying sectors anyplace other than their origin. You can take a copied sector and place it down in void space anywhere, so we're safe with our little void-island. Begin drawing a new sector, starting with point number 1 in the following image. Hit every point in sequence through 8, stopping back at 1. It is imperative that each and every vertice & line of our copied sector is joined with the new sectors. We're going to create two of them.
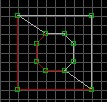
Create another new sector for the remaining void area.
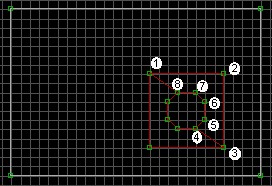

All lines should now be red, indicating we've successfully removed any void space. You probably don't want, and really don't need, those two temporary sectors we used to take up the void space. Let's join them with the parent sector. Point the mouse crosshair anywhere inside the biggest,
right-most sector. Press [J] once. Make sure you see at the bottom of your screen (in the action bar) the line reading "Join sector - press J again on sector to join with" before going any further. If you don't see this, then it didn't register you hitting the [J] key. Press 'J' on one of the two temporary sectors, and it will merge with the parent. Follow the same procedure for the other temporary sector.
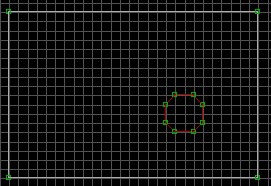
Notes on Joining sectors: Whichever sector you hit [J] on first will retain its floor/ceiling heights, shading, tiles, etc. The other sector will lose all of those attributes, and basically disappear. It's very upsetting to accidentally join a junk sector with a good sector. You can only join sectors that share at minimum one red line, or if the sector is within another. Avoid at all costs joining sectors that overlap other sectors. If you point your crosshair in any area which could be two or more separate sectors and hit 'J', there's no way to tell which sector you've hit. Pressing 'J' on the other sector may cause an underlying or overlying sector to be joined with a totally unattached sector. This is deadly. There is no way of backing out of this error without reloading your level.
Start out making three sectors as in the image. The middle sector will be our door, and the other two simply rooms.
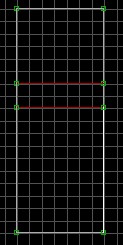
Insert a SectorEffector, Activator, and MusicAndSFX sprite within the middle, door sector. Change the SectorEffector lotag to 32. Set the MusicAndSFX lotag and hitag to 166, or whichever door sound you prefer. Leave the Activator tags as is for now.
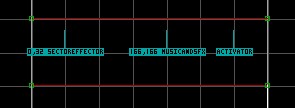
Switch to 3d mode and place a switch sprite on the wall. It's easier to place sprites in 3d mode and make them fixated in a certain plane. If you place a sprite in 2d mode, by default the sprite will follow you as you walk around it. Obviously, this won't work for our switch. You can press [R] on the sprite in 3d mode to fixate it, but if you insert the sprite in 3d mode while first pointing at the wall, it will start fixated :). Change the switch lotag to a unique switch number (I'll use 1 in this case). Give that same switch lotag number to the activator lotag.
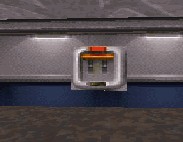
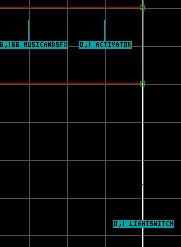
Lower the ceiling of your door sector so that you can change the door tiles. We're not going to lower the ceiling of the door down to the floor, as the SE-32 sprite will allow us to start the sector ceiling at the same height of the SE sprite. Change the angle of the SE-32 to point downwards, and make sure the sprite is all the way on the floor (use [CTRL]-[PgDn] in 3d mode to ensure this.) With the SE-32 pointing downwards, the ceiling will start at the SE height. It's much easier editing tiles, moving sprites, and the like if the door is open in Build :)

Floor, Ceiling, and Split Doors
Start up Build and make two separate sectors, one sector (10 units per side for now) and the other right above it, its bottom wall running parallel to the top wall of the lower sector. Insert two vertices 6 or 7 grid spaces apart on each of the walls of the two sectors. Make another sector (basically joining your two sectors) using the four vertices you just inserted. Your design should be close to the image shown.
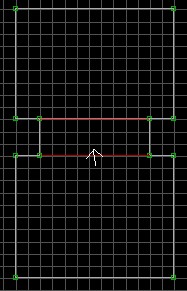
While in 2d mode, point the mouse pointer inside the new "door" sector (the one sandwiched between the two bigger sectors) and insert a sprite. Move the pointer over a little ways and insert another sprite. It is critical that these sprites be inside that sector. Switch over to 3d mode and change one of the sprites to a Sector Effector (SE), and the other to a MusicAndSndFX. Switch back to 2d mode and set the tags for the SE to 64 hitag, and 10 lotag. The hitag is used for the length of time the door will stay open. 64 is about 2 seconds. The lotag is for Door Auto Close. Change the MusicAndSndFX sprite's lotag to 166, which is the Doom-like sound of a door opening. Set the door sector's lotag to 20, which is for a ceiling door. Finally, when all that is complete, switch back again to 3d mode and lower the door's ceiling all the way to its floor. Just make sure you've picked the tiles you like first :)

To make the door come down from the ceiling, simply change the sector lotag from 20 to 21, and move the door sector's floor and ceiling to the surrounding sector's ceiling
To make the door split from the middle, simply change the sector lotag from 20 to 22, and move the door sector's floor and ceiling to the middle of the door.
Start out making four sectors, two large ones of varying size, and two smaller ones (each attached to one of the bigger ones) which will become the actual elevator. Each smaller sector must be exactly the same size.
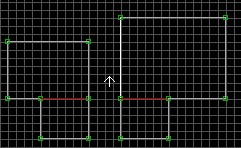
Insert a Sector Effector within each of smaller sectors and change the SE lotags to 17, which is for an elevator. Assign a unique elevator number and put that in both of the SE hitags. Change both of the smaller sector lotags to 15. Pick one of the two to be the higher floor, and change that sector hitag to 1. Leave the other at 0. It's a good idea to put the SE sprites on the same coordinates of both sectors; that way Duke won't shift when he goes up and down it. Also make sure the SE sprites point in the same direction (same angle).
That's it for tags and such, now you must go into 3d mode and change the shades of the SEs, as well as the floor/ceiling heights of the two elevator sectors. The two elevator cars must be built at physically separate heights. The ceiling height of the lower floor must be lower than floor height of the upper floor, or it won't work. You'll get in the elevator and either rise or fall for an eternity. Put the white arrow in the lower sector and switch over to 3d mode. The darker shaded SE-17 is the floor where the elevator will start. I found this shade should be at least 32 shades dark. To darken the SE, point at it in 3d mode, hold down the ['] key and hit [S]. Enter the number 32 and hit [ENTER].
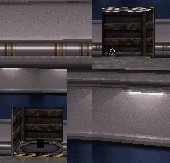
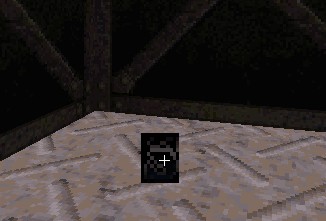
Make one large sector, and place two island sectors within it. Make one of the island sectors only a few units to a side, this will be the trigger platform. Make the other island sector nearly as large as the outer sector. Insert two vertices, one on both the top and bottom lines of the inner, larger sector. Split that sector and make some jagged edges, like the picture. This will be the sector our earthquake will happen to.
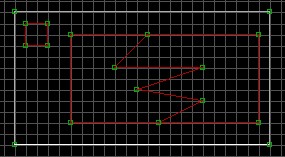
Switch over to 3d mode and change the floor slope of one of the jagged sectors so that it drops below the floor height of the surrounding sector. You may have to change the wall alignment of that sector by pointing at the "pivot" wall and hitting ALT-F. This will cause the slope of that sector to start
from that particular wall.
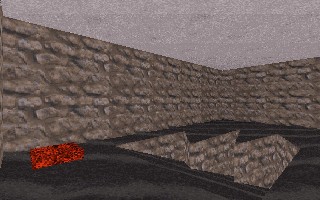
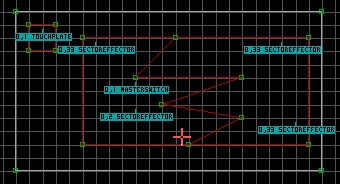
Insert a SE within the dropped-down sector. Change that SE lotag to 2. Insert a MasterSwitch sprite within that same sector. Change the MasterSwitch lotag to 1, our unique earthquake number. Insert a Touchplate sprite within the smaller island sector. The earthquake will trigger when the player walks across this little sector. Change the Touchplate lotag to 1 as well. Turn off gridlockingand move both the SE-2 and MasterSwitch sprites close to the one of the jagged points, but not outside the sector. Make sure the SE-2 and Masterswitch are on the floor by hitting CTRL-PgDn on them. I've also put in three SE-33 sprites, which are used to spawn little bits of rock when the earthquake occurs. Switch to 3d mode and move them to the ceiling by hitting CTRL-PgUp.
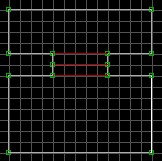
Start out making four sectors, like the image. The two middle sectors will be our glass borders.
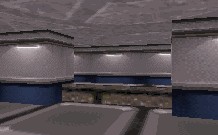
Change to 3d mode and raise the floor of the top-middle sector.
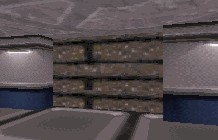
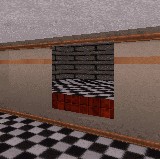
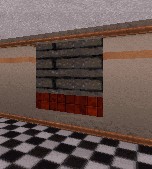
Press [M] on the lower "step" portion of the newly exposed wall (that ugly brown texture in the image above.) This will fill the space between the floor and the ceiling with a single tile (so it's masked.) Press [V] on that tile between the floor and ceiling, so that you can change the tile. Press [V] again, and select tile number 503.
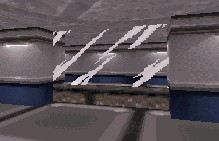
Now lower the floor of the top-middle sector so it's flush with the surrounding sectors. Now, by default, any newly created maskwall is not going to be blocking, or hittable. Press [B], then [H] on the glass tile to make it [B]locking and [H]ittable (don't do it in reverse... pressing [H] first then [B] will only make it Blockable... weird.)
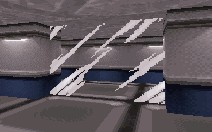
If you choose to make the glass breakable, and also have the lower and upper step tiles showing, there are certain instances where breaking the glass will cause the tiles to shift, messing up any alignment you've so meticulously set. If this happens, press [O] once on either the top or bottom step tile to set them aligned to the ceiling. That should fix it.
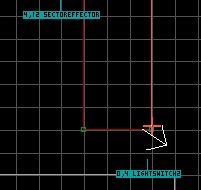
With your sector already in place, switch over to 3d mode and point the cursor in the approximate location on the wall you wish to place the switch. Hit [S] to insert a sprite, then change its tile to the appropriate one (lightswitch is tile #712). You should verify the sprite is placed on the wall by sliding around it and checking to see if it stays put or follows your viewpoint. If it stays put, you've landed it on the wall. Having it on the wall will avoid those nasty image clips, which never look good when playing. Move the sprite to Duke's level using PgUp/Dn so Duke can get to it.
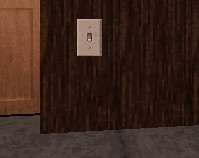
Insert a Sector Effector within the sector you wish to be darkened and lightened by this switch. In 2d mode, change the lightswitch sprite's lotag to a unique lightswitch number, again keep track of what numbers you have used. Change the SE lotag to 12, which is for Light Switch. Change the SE hitag to the number you gave to the switch. This is how the game knows which switch lights up which room. Set the shade of the SE to the brightness you want when the light is flipped on, and set the sector's shade to the darkness you want when the switch is off.
Start out making three sectors: one large room on the bottom which will be our room to be mirrored, one middle sector which will hold the mirror, and the third which will be used by the game to generate the mirrored image. Make the third room bigger than the to-be-mirrored sector, but make sure it is the same floor/ceiling height as the sector which "holds" the mirror. For some reason, if the larger room is at different heights, you'll get HOM when Duke ducks down. It is crucial that the room be larger than any space the mirror could possibly see.
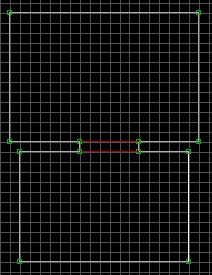
Switch to 3d mode and alter the floor/ceiling heights so they resemble the image. Make the floor of the top sector higher than the other two for right now. Make the mirror sector wherever you wish; here I've made it a few notches higher than the main room, and a little bit lower. I've also changed
the tile of the top sector so that we can discern more easily from the other walls.
Point at the wall (which I've made red here) of the top sector and hit [1]. This will make it a one-way wall. You should see a tile fill the gap between the floor and ceiling of the top sector. Point at this wall and change its tile to tile number 560, which isn't very easy to spot, even in 320x200 mode. It is named mirror, fortunately.
While still pointing at the wall, hit both [B] and then [H]. This will make that wall both blocking and hitscan, which will prevent us from walking through it, and also make it sensitive to ammo hits. If you switch back over to 2d mode, you will see the wall appear a bright pink.
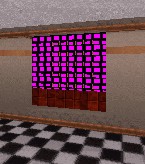
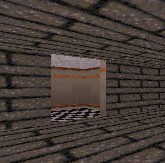
Elevator Platforms are probably the easiest of all sector effects. All they require is a simple Sector Tag to work. I'm going to cover all four of the different platforms on this page. Make your lower floor and upper floor like the image, with four elevators.
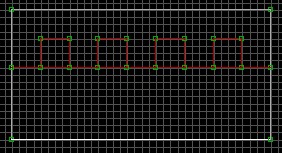
Switch to 3d mode and set the floor/ceiling heights like the image. The left-most elevator will drop down from its current height when activated, floor only. The second elevator will rise from its current height, floor only. The third elevator will drop from its current height, both ceiling and floor. Finally the fourth elevator will rise from its current height, both ceiling and floor.
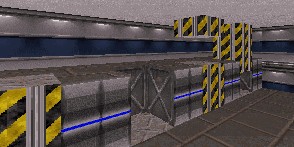
Set the first sector lotag to 16, the second to 17, the third to 18 and the last to 19. Insert four MusicAndSFX sprites, one per platform, and change all of their hitags to 73, and all of their lotags to 71. That's all there is to it.

Start out making two sectors, one larger room and a smaller, inner island sector. The inner island sector will become the light.
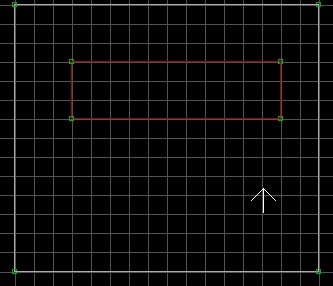
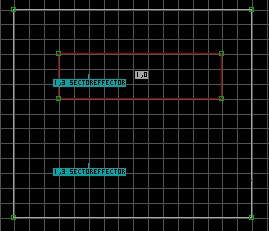
Insert two Sector Effectors, one in each sector. Change the SE Lotags to 3. Change the SE Hitags to a unique SE-3 number, Ill use 1 here. Change the Sector Hitag of the light sector to 1 as well.
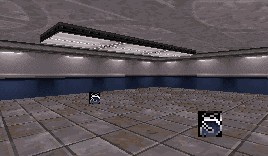
Switch to 3d mode and set the ceiling tile of our inner sector to a Light tile... tiles 120 through 125 are good for this. Make sure you don't choose a tile with the word BUST in it... that tile is used by the game to show the Light is busted.
The shade of the SE-3 sprite determines the brightness of that sector when the Light is on. Set all of the walls/ceilings/floors in this sample to some darker shade by pointing at one in 3d mode and hitting the [-] key 8 to 10 times. You'll want to copy that shade throughout both sectors, so that they all match up. To copy shade values, point at the wall you want to copy. Press [TAB] to get that wall's attributes. Then point at any other wall, hold down the [SHIFT] key, and hit [ENTER]. This will copy only the shade value... very handy. Do the same for every tile in our sample map... but don't change our SE-3. For more things you can try with this effect, see the SE Reference Guide.
Start out making one large sector with a smaller sector inside it, as an island. For posterity's sake, let's make the inner sector a circle. Switch over to 3d mode and raise the inner island sector up a few notches so that we can differentiate the two.
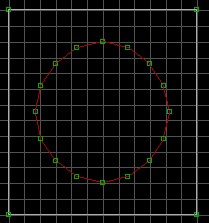
Place two SectorEffectors within the inner island sector. Change both of the SE hitags to a unique rotating sector number above 0. Change the lotag of one of these SE sprites to 1 and leave the other SE lotag at 0. The SE with the lotag of 1 (SE-1) will be your pivot point to which all of the SE-0 sectors (with identical hitags) will rotate around. You can place the SE-1 anywhere you like, it does not have to be within the sector you're rotating. In this example, I've put the pivot point right in the middle of the circle sector.
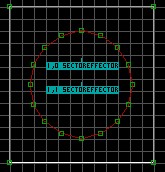
You can have multiple SE-0 with the same hitag, but you cannot have multiple SE-1 with the same hitag. To have the sector rotate clockwise, set the angle of the SE-1 to upwards. Set the SE-1 angle down for counter-clockwise.
You will probably want to have any sprites (including Duke) placed on that sector rotate with it, so change over to 3d mode and set the floor tile to be Relatively aligned. You do this by pointing the crosshairs at the floor of the sector you wish to rotate and hitting [R]. You should see the tile shift a little bit. If you don't have the floor Relatively aligned, the walls will look like they are rotating, but the floor will not. If Duke stands on the sector, he won't rotate with it. This might come in handy if you wished to set up scrolling tiles, like a message bar.
Start out by making 6 sectors like the image shown. Set the Sector Tag of the two smaller sectors to 25. For the rest of this page, I'm going to refer to these two sectors as the "Tagged Sectors". Do not change any of the floor heights of these sectors you've created, they should all be the same. What basically is going to happen is the game will shift any non-player space (marked by the white lines) in each of the tagged sectors to either the left or the right depending on how we've set it up. Therefore, the ceiling and floor should be at where you want it to look when the door is open. The two sectors directly to the top and bottom of our tagged sectors are going to be used in a step later on; they are important to place.
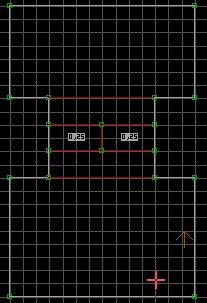
Insert two SE sprites, one in each of the tagged sectors. Change their hitags to a number not used elsewhere by any sliding door. We want to make them the same hitag so both doors will open at the same time. Change the SE lotag to 15. Insert a GPSpeed sprite within each of these two sectors. Change the GPS lotag to 512. The GPS lotag is the distance the doors will open. This will probably take a lot of adjusting as you test your level. The last thing to insert is a MusicAndSndFx sprite. You only need to insert one, as both doors will open simultaneously. Just make sure the MSFX is within one of those two sectors. Change the MSFX lotag to 170, which is a long, dragging sound.

Change the angle of the left-most SE-15 to point right. Change the angle of the right-most SE-15 to point left. They should point in the direction the door will close to. Take grid-locking off and move all of our Sector-Effectors, GPSPEEDs, and MSFX sprites as close to the dividing line as possible. It also helps to take off showing of tags by hitting [CTRL] - [T].

The next few steps are a little difficult to explain, so I'm going to show them in little increments. With grid-locking off, insert three vertices on the two white lines of our tagged sectors.

Turn grid-locking back on, and move the top points (which are now our "doors") onto the tagged sectors' lines, making sure not to leave the sprites outside of player space. Move the two middle points to the very center spot. They will occupy the same space, but will not be deleted.
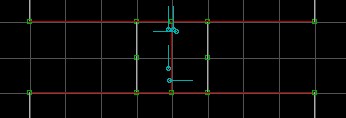
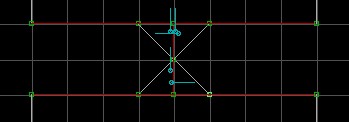
Move the adjacent top sectors' vertice to the tagged sector's top line.
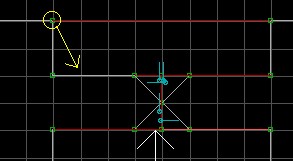
Move it right on top of the tagged sector's top line.
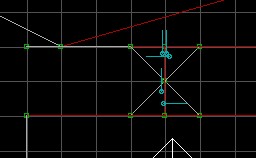
Do the same for the other three. They should all be on the tagged sectors' lines.
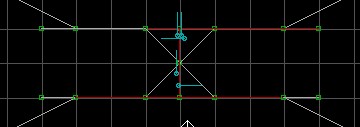
These last few steps were necessary to avoid texture warping; that nasty little effect when sectors are getting pushed around. The warping is still there, the player just can't see it :)
Create one decent-sized room, with a hall extending out of it. Switch to 3d mode and pick a tile for the walls that has a horizontal stripe. Adjust the tile position (using the arrow keys) so that some easily-identifiable line is at the ceiling. Here, I'm using the light as a guide. Slope the floor and ceiling of the hall upwards so that the far end of it is higher than the tile mark. This ensures any sectors we create at the end of the hall will be higher than our first sector.
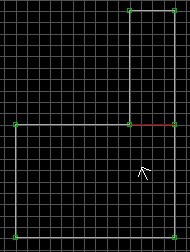
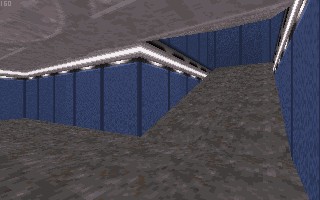
There are some limitations to Sectors Over Sectors, so let me cover them now:
1. Build cannot "see" two overlapping sectors at the same time.
2. Overlapping sectors cannot share red lines.
3. Overlapping sectors must be built at separate physical heights.
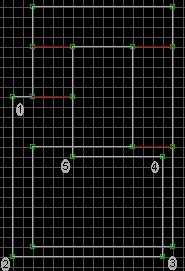
Add three more sectors, like the image shown. But pause after you create the first sector coming off the sloped hall. Sometimes Build will go in and mess up your floors/ceilings when adding sectors to a sloped sector. Mainly, it's going to set sloping for the new sector. If this happens, you'll want to correct the situation before adding too many sectors. To take all sloping off of a sector, point at the floor and/or ceiling and hit [/]. You'll notice in this image that I've inserted extra vertices in the last sector. We're going to use these vertices to extend that sector over the lower sector.
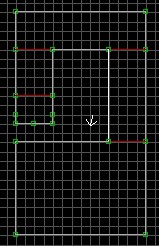
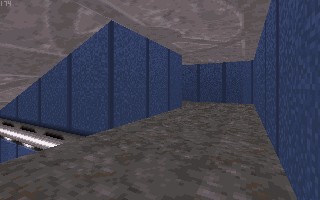
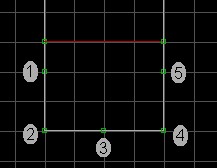
Move the vertices of the last sector over the lower sector. I've numbered the vertices in the first image, and shown their corresponding results in the second image.
Switch to 3d mode, and "walk" between the upper and lower floors. Kinda neat, huh? You may ask what that fourth sector was for. We created that sector so that there is no single spot where Duke is able to see two overlapping sectors at the same time. Also, it is not a requirement that you drag vertices over an existing sector to create the effect. You can create new sectors over existing ones, so long as you've started from a point that is known to be at the level you want. If you just start creating a sector in an area shared by two or more overlapping sectors, it will default to the lowest physical sector.
Some sage advice on Sectors Over Sectors:
• Never attempt to join sectors in areas that are overlapping. This can cause many, many problems... especially if you're trying to join sectors that are higher than the lowest overlapped sector.
• Always create your sectors/sprites off to a side, and don't overlap sectors until you're ready to finish the map. Create a long hallway if you need to give yourself room. Joining, splitting, and moving sectors that overlap is a real nightmare. Just create them off to a side, and move the entire lot over when its ready.
• Don't insert/move sprites in 2d mode in an area of overlapped sectors. They default to the lowest sector, and probably not the sector you're trying to use.
• If you've moved your finished sector over a bunch of other sectors, and need to go back and change something, remember there are keys in 3d mode to change hitags and lotags. They are [']-[H] and [']-[T] for hi/lo, respectively.
Star Trek Doors (Split and Normal)
Start out making five sectors, like the image here. The top and bottom sectors are the two rooms being joined. Set the Sector Lotag of the very middle sector to 9 for Normal Star Trek Door, or 26 for Split Star Trek Door. From here on out, I will refer to this as our "tagged" sector. This will become the door. The two sectors surrounding the tagged sector are entryways, so that the door has equal floor/ceiling heights on both sides to use as markers.
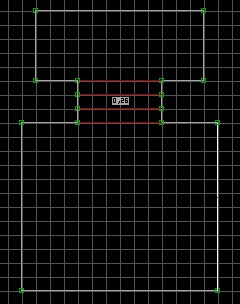
Take grid-locking off and insert six vertices; three per white line of our tagged sector. The four points, marked by the little green arrows, must be kept in line with the door's red lines. We'll do this in the next step.
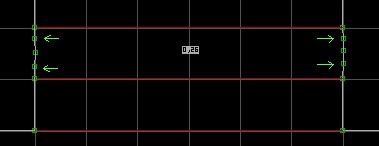
We need to move the white line vertices we just inserted so they represent the shape of a door, one door on each side. Two catches when making Star Trek Doors: 1) the white lines of the door must be right on top of the red lines of its parent sector, and 2) you must have both halves of the door touching in the middle. What will happen in the game is this: the door will split open from the middle, the ceiling will raise to a neighbor, the floor will lower to that neighbor, and any void-player space (our door) will move to the sides. Hit [G] in 2d mode to increment the grid spacing by one. We need to be perfectly inline with the red lines, and our two doors must meet in the middle. Move the vertices so they come close to the image.
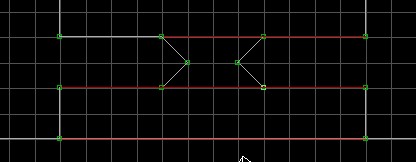
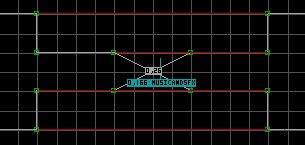
Take it one step further and move the two points of the door halves so they share the same spot. They won't join into one... they will simply occupy the same place in Build. Insert a MusicAndSFX sprite in now before we get any further. This sprite must be located in the player space area. Set the MusicAndSFX lotag to 166, or any music number you prefer. The lotag represents both opening and closing sounds.
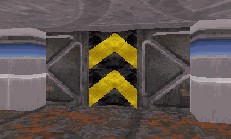
Now is a good time to set the door's tiles. Switch over to 3d mode and set your tiles. Please note the tiles of our door will squish when the door opens. Our door is pretty small and will open very fast, so the player shouldn't notice anything unusual about the tile squishing.
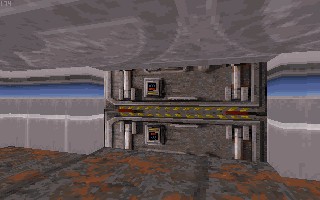
If you only wanted to make a Normal Star Trek Door, you could stop here. If you want to make a Split Star Trek Door, we still have another door left to handle... the door that splits from the middle and opens vertically. Luckily, there are no more sectors to add. The sector already exists... it is our tagged sector.
Switch to 3d mode and point at the sector floor of our tagged sector. Raise the tagged sector's floor so it reaches the middle-height of the surrounding rooms. Change the floor tile to an appropriate door tile, and do the same for the tagged sector's ceiling. Now point at the tagged sector's ceiling and lower it as far as it can go; right down to the "floor", which is now in the middle of the room. Set the door's tiles, and you're pretty much finished.
You'll probably want to have separately editable tiles for both the top half and bottom half of your door. Remember that to make them separately editable, you hit the number [2] when pointing at the wall.
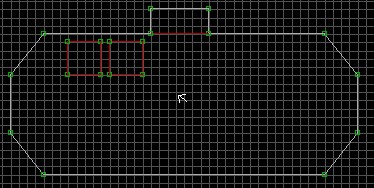
Start out making one large oval sector, with a "station" at the top and two island sectors which will become the cars. Set the floor tile of the large oval sector to tile #859 (railhurt) to have Duke get zapped if he stands on the rails. Change to 3d mode and raise the floor of the island sectors so you can see them. Point at their floors and hit [R] to make them relatively-aligned (sprites will move with the subway.)
Change both of the island sector hitags to 1. Insert a SectorEffector within each of the two island sectors. Change the SE lotag of the lead car to 6, and the trailing car SE lotag to 14. Change the angle of the two SEs to the angle in which the car will begin travel, ie the line will point right if the car is to start moving to the right. To make multiple groups of cars, change the sector hitags of the second group to 2, and so on. You can have more than one car as well, or even just one lead.
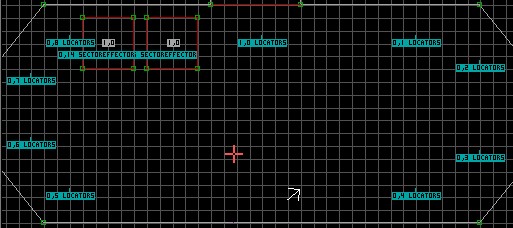
Insert 9 locator sprites (LS) positioned like the picture below. This is the path your cars will travel through your level. You must uniquely identify each of the LS lotags. Starting from the top-middle locator, start counting from 0 and change each of the locators lotags, following the path you wish the cars to travel. The cars will travel in succession across the locators. To make the subway cars stop at a given locator, change its hitag to 1. If you plan out a lengthy track, make sure you place extra locators and assign them in the proper order. That way, if you want to add another stop along your track, you won't have to go changing every locator lotag after it or their relative position. The SE hitag of the individual cars points to the first locator it will come across. In this example, the hitag is set to 0, which is the first locator we want it to cross.
That's all you need for a functioning subway. But it's pretty lame, and not much fun. We're going to add some interior walls, a window, and bench seats to our subway cars. There are a few key points to note when dealing with sectors-in-sectors and subway cars:
The outer, parent sector is the only sector which can contain the SE-6 or SE-14 sprite.
Each inner sector must have the same hitag/lotag combo as the parent.
Each inner sector may only share one line with the outer sector.
Duke can only walk on the parent sector, or he'll get shuffled right off the car and possibly get squished.
Each interior sector must be made of red lines; no white lines are possible.
Interior sectors may only be one level deep; ie no sectors within those interior sectors.
With those limitations in mind, let's create a front and back wall to our car. Both walls will be completely inside the outer sector. The front wall will be comprised of three joined pieces: the left and right sections, and a middle section that will become a window. When you create sectors within sectors, they automatically pick up the same tag as their parent. Make sure you've set the parent sector hitag according to the instructions given earlier.
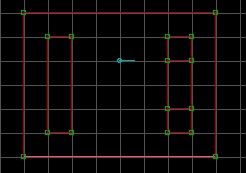
Take grid-locking off and move the points of our walls to the very edges of the car, but don't overlap any red lines or vertices. While it may look like they overlap in this image, they really do not.
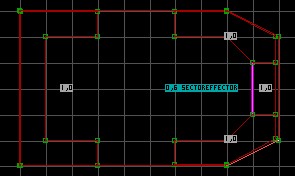
Switch to 3d mode and lower the ceilings of the back wall, and the two side pieces of the front wall, all the way to the floor, blocking Duke from walking through. Raise the floor of the middle/front wall a little ways to make a window sill, and lower the ceiling.
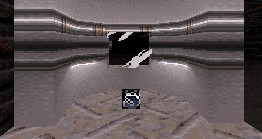
Add two sectors within the car. These will become the bench seat. Take grid-locking off, and move them real close to the back wall, but not overlapping. You should get the feeling that we're trying to work around the limits of the engine... we are. While in 2d mode, make all of the walls of the bench blocking (hit [B] on them.) We need to do this to ensure Duke won't walk on them... they're nice to look at, but Duke will get shuffled right off the car if he attempts to walk on them.
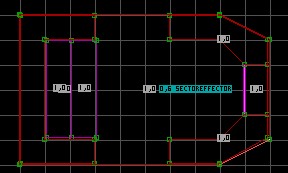
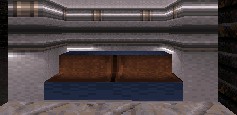
Start by making two sectors, attached to each other by a single wall. Make one of the sectors bigger than the other, with clearance on either side of the red line as pictured. The top sector must be taller than the red line, so that when the door swings open, it has room.
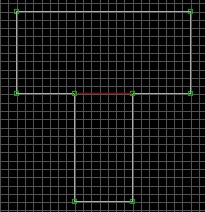
Insert a vertice somewhere in the middle of the red line. Start drawing a sector from one of the corners of the smaller room, touching the larger room. We want to make a penisula sector inside the larger room. Make at least four sides for now. Finish this penisula sector on the vertice you inserted on the red line. Make the sector big enough so that you can place sprites and change tiles & heights easily. You'll want to shrink the sector down when it's finished to the appropriate size of a door, but for now give yourself some room to work. I've made the top sector rather small for graphic-size constraints. You should make the sector large enough to accomodate the swinging door; ie the longest wall of your door should be shorter than the room you have allocated for the door to swing into.
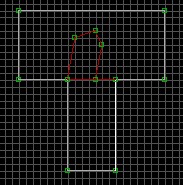
Drag the vertice you inserted earlier (on the red line) to the corner you used as the starting point (pivot) of your penisula, so that the vertice will be deleted. It is critcal that only one of the vertices of our door sector share the point with another sector. We had to insert the vertice on the red line earlier because the Build editor won't allow you to use that corner vertice again. It's just a little caveat.
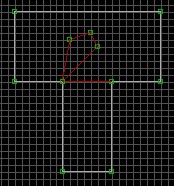
Insert a SectorEffector within our door sector. Change that Sector Lotag to 11, which is for Rotate Sector Door. Assign a unique Swinging door hitag to the SE. Multiple SE-11 with the same hitag will all open, or rotate, at the same time. This is useful for double doors. Change the sector lotag to 23.
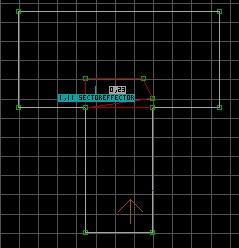
Turn off Tag Display by hitting CTRL-T, so that you can see the angle of the sprite better. Switch over to 3d mode and set your tiles and floor/ceiling heights of the door sector accordingly. The entire sector will rotate, both ceiling and floor. Set the door sector ceiling to the same height as its parent sector's ceiling if you want to see just the lower part move when playing. Switch back to 2d mode and Turn off grid lock by hitting [L]. Move the vertices of your door to fit the width of your opening, like the picture below. Insert two vertices, really close to the pivot point. I've marked them with little green arrows here. These points will stop the tile squishing that occurs when our door is rotated open. Build takes all of the points of our door sector and rotates them around the SE-11. Well, any points attached to permanent walls will rotate with the door as well, messing up the tile alignment.

You can overlap red lines and other vertices here because the door sector only shares that single point. Also move the SE to the very corner, or pivot point. Look at the angle of the SE by noting the line coming from the sprite's circle point. If the line is extending upwards from the circle, the door will rotate counter-clockwise. If the line is extending downwards, the door will rotate clockwise (the BuildHlp file has it backwards). Insert a MusicAndSFX sprite within the door sector. Change the MSFX hitag and lotag to 165, a nice door-sound. The MSFX hitag is for the door closing, the MSFX lotag is for the door opening.
Start out making two sectors, each 15 units or so on a side. Then make two "island" sectors within them, one island in each of the two bigger ones. As a reminder, you make an island sector by drawing a sector completely within a bigger sector, then hitting ALT-S with the mouse pointing inside the smaller sector. The inner sector walls will turn red. The island sectors do not have to be the same size, even though this picture shows them as being so.

Insert a Sector Effector (SE) within each of the two island sectors. Change both of the SE's lotags to 7, which is for transport. Finally, change both of their hitags to a unique transport number, just make sure both hitags are equal. This is how they know which sector to transport to. I don't know what would happen if you set three or more SE-7 hitags to the same number, but I have a feeling it won't be pretty.

Start out making a doom-like door. The SE-8 will only work with a sector that raises the ceiling. Make the top room like the image, with a wall extending through the middle. We're going to use this to create a neat lighting effect. The light will basically "originate" from the lower sector.
Before we start splitting the sector, switch to 3d mode to set your tiles, and darken (7 or 8 clicks) the top sector's walls, ceiling, and floor... it will save a lot of needless duplication. We set the sector's shade to when the door is closed. A quick way of copying shade values is to point at a darkened tile and hit TAB. Then point at any other tile, hold down the Left SHIFT key, and hit [ENTER]. This will copy the shading value only. Very handy.
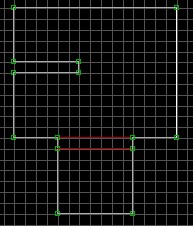
Switch back to 2d mode and and split the top sector into light-source slices, like the image. We're going to set the shade of each of the slices slightly different from the others around them to create a dithering effect.
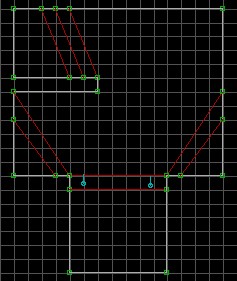
Insert 9 Sector Effectors, one in each section of the top sector, and one in the door sector. Change all of the SE lotags to 8, and change all the SE hitags to 1 (should be unique for multiple sets.)
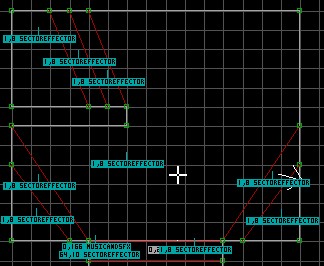
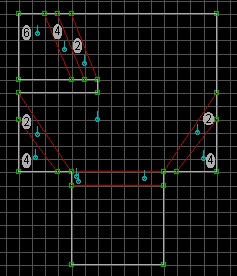
Switch over to 3d mode and darken the shade of the SE-8 sprites in the sliced sectors. By default, a Sector Effector will have a shade value of 0 when first created. This will create a fairly bright sector when we open the door, so our largest section of the top sector and the door sector can stay at that value. The three SE-8 in our sliced sectors should be darkened by two clicks. Point at the SE at hit [-] two times. The three after that should be darkened by four clicks. The last remaining SE will be at six clicks. I've put numbers representing the shade value next to the SE sprites in this image. You'll also notice my door is not all the way at the floor; I do this so that any changes I need to make to the different SE and shading can be accomplished much easier.

If you have a wall within a sector that you don't want to light up when the door opens, Set that wall's hitag to 1. You'll want to do this for the interior door wall; as no light can really reach it.
Run your level and check it out. Stay inside the room when the door closes and you'll see the slices darken to one shade and lighten to three separate shades... very neat.
Start out making one sector with an island inside it. Make the larger sector 15 to a side and the smaller island around 10x5 units. The larger sector will be your room, and the island sector will appear as water. Off to the side, and separate from the other two, make another sector that is exactly the same size as the island sector; 10x5 or whatever you made.
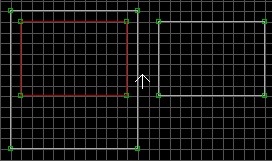
Place a SectorEffector in both the island sector and the separate sector. Change the SE hitags on both to a unique Water Sector tag, again keep track of which numbers you've used. Set the SE lotags to 7, which as you might already know, is for transport. That's basically what water sectors are; you transport to another sector that is underwater. The differences being there isn't the transport sound and flash, and you transport by either falling through the floor or by swimming past the ceiling.
The two SE-7 must be in the same location on both sectors or you'll have nasty deaths. Set the sector lotag of the "above water" sector to 1. Set the sector lotag of the "below water" sector to 2. Change over to 3d mode while putting the white arrow in the "above water" sector and change the floor tile to the water texture. Do the same for the "below water" sector ceiling.
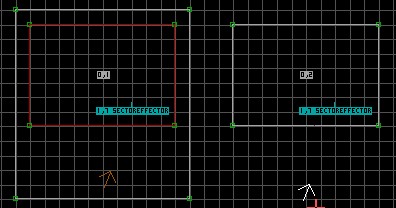
Make four sectors, like the image shown. The two large sectors will be the track and platform, and the inside sector will be the actual train.
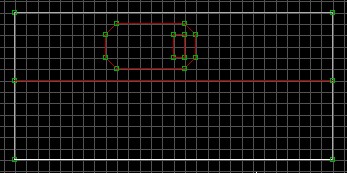
Change the sector lotag of the two inside sectors to 31.

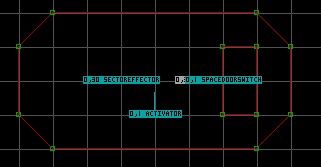
Place a Sector Effector sprite inside the car sector, and change its lotag to 30. Change the angle of the SE-30 to point towards the front of the car. Change to 3d mode and raise the floor of the 2x1 sector inside the car. Place a switch flat against the wall of this raised sector, and change its lotag to a unique switch number, I'll use 1 in this example. Insert an Activator sprite within the car sector, and change its lotag to the same number you gave to the switch lotag. The Activator is what triggers the SE-30 when the switch is flipped.

Place two Locator sprites, one on each end of the track, to mark the two points at which the car will stop. Change the lotag of one of the two Locator sprites to 1, it then becomes point B.
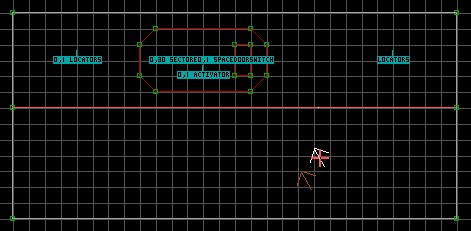
You can trigger separate events when the car stops at the two Locator positions. For instance, you can have a door open when the car stops at the left-most position. I'll show an example of having two doors open up, each opens when the car stops at that given Locator. Ive already made the doors.
To do this, you need to change the SE-30 hitag to a unique Activator number, I'll use 5. We then place an Activator sprite in the two door sectors. They will then trigger the Sector Tag (or SE if one was there) within those sectors. Here, we want to trigger a door, which is Sector Tag 20. Change the lotag of the Activator you wish to be triggered when the car stops at point A (Locator with no tags) to the same number you gave to the SE-30 hitag (5). Move over to the other Activator, and change its lotag to 1 + the SE-30 hitag (6). This will trigger when the car stops at point B (Locator with a lotag of 1.)

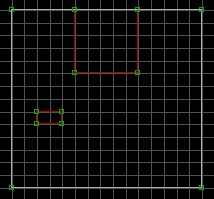
Start out making three sectors, like the image. The top peninsula sector will become the actual bridge. The little island sector is just a place to put our switch so we can watch the bridge move.
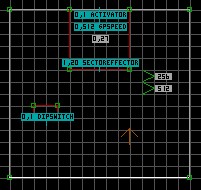
Insert a Sector Effector, Activator, and GPSpeed sprite within the peninsula sector. Change the sector lotag of the peninsula sector to 27. Change to 3d mode and raise the floor of the peninsula sector up 2 or 3 clicks to make it stand out. Raise the little island sector up 12 or13 clicks so you can place a switch at Duke's level. Insert a sprite flat against one wall of the island sector, and change its tile to some switch tile (I'll use dipswitch, tile #162.) Change the switch's lotag to a unique switch number (I'll use 1 in this example.) Give that same number to the Activator Lotag and Sector Effector hitag. Change the Sector Effector lotag to 20. Move the Sector Effector near the wall you wish to have the bridge extend from. The bridge will use the wall closest to the SE-20 as its point of origin. Change the angle of the SE-20 to point in the direction you want the bridge to go. We want our bridge to extend towards the switch, so the angle is set to point downwards.
The GPSpeed sprite will determine the distance the sprite will move. When you first start Build, the default grid size is 256x256 units. So, to make the bridge move two grid spaces, you'd set the GPSpeed lotag to 2x256, or 512. The little green arrows in the image are my additions; they only show the distance being marked off.
Change to 3d mode and point the cursor at the floor of the peninsula sector. Hit [R] once to set Relative Alignment, which will make the floor expand as the sector stretches out. Please note the ceiling will also expand, so the tiles will look offset to the rest of the ceiling around it. By using Relative Alignment, the tiles will appear to expand from the Sector's FirstWall. To change the FirstWall assignment, change to 2d mode and move the cursor inside the sector to be modified. Move the cursor close to the desired wall so that it starts to flash. With the cursor still inside the sector, hold down the [ALT] key, and hit [F]. You can also do this in 3d mode, by pointing at the wall inside the sector, then hitting [ALT] +F. But there's not always a wall there, ie if another sector shares that wall, and the ceiling and floor are flush between both sectors.
Cranes are yet another of Duke 3D's many fascinating features. By their ability to pick up and drop any graphic sprite (whether fixed or animated) at predetermined locations, they offer many possibilities to the map designer and can bring another tactical element to the game when used in Dukematch levels. Oddly enough, very little has been written about cranes (the BuildDocs omit them entirely) although they are used in the popular E1L4 level: Toxic Dump.
While cranes operate all by themselves, conveyor belts will be needed in most instances for moving objects around.
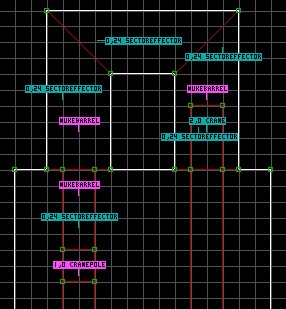
Start by making a large outer sector and two smaller inner void sectors as shown here. Go to 3D mode right away and make the ceiling height about 70 clicks above the floor. Go back to 2D mode and draw the remaining sectors by adding new vertices where required and also by splitting the existing ones. Raise the floor of sectors 2, 3, 4, 5, 6, 7 and 9 high enough so that Duke can't jump up to them (30 clicks in the example map) and raise the floor of sectors 1 and 8 a few clicks to create a platform. Also, raise the ceiling height of sectors 1, 2, 3, 4, A, and B by 4 clicks above the previously set ceiling height. These will be the crane ceiling track sectors.
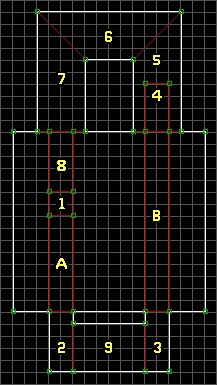
Using the [S] key, place two sprites at the locations shown in the picture on the left. Next, go to 3D mode and with the cursor pointing at the sprite in sector 1, hit [V] twice. Select tile #1221, a vertical pole appears. As far as the cranepole sprite is concerned, you can bring it all the way to the ceiling or the the floor or even just leave it where it is, this has no effect on its function in gameplay. Aim the cursor at the second sprite, hit [V] twice, select tile #1222 and the crane appears. This sprite has to be on the ceiling to work properly so hit [Ctrl-PgUp] while aiming at it. Go back to 2D mode, point the mouse cursor on the cranepole sprite, hit [B] to make it blocking and using [Alt-H], assign a unique hitag to it (1 in this case). Change the hitag of the crane sprite to the same value as its target cranepole and use the [<] and [>] keys to change the angle so it points in the direction the crane will travel. Repeat this process for the crane-cranepole pair in the picture on the right using different hitags. The lotag values of these sprites have no effect. Just make sure the crane sprites sit exactly in the center of their track sector.


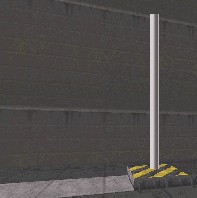
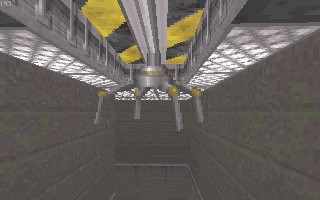
Cranepole sprite Crane sprite
At this point, feel free to take a little time to change the ceiling track texture (tile #353 in the top right picture), the ceiling track inner side walls texture (tile #288). If necessary, use the [F] key to flip the ceiling texture and since the crane sprites were previously centered in their respective sectors, they can be used as a reference to center the ceiling texture using the [Shift-4] and [Shift-6] keys.
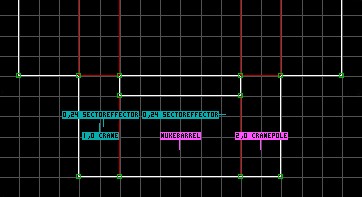
Now, in 2D mode, insert SectorEffector sprites in sectors 2, 4, 5, 6, 7, 8 and 9 where the conveyor belts will be, hit the [Alt-T] key and change their lotag value to 24. Change the angle of these sprites to point in the direction of belt displacement as shown in the pictures left and below, there are 7 in all. Also, place 4 NukeBarrel sprites at various locations on the conveyor belts. In this example map, they have been made to be blocking but this is not necessary.
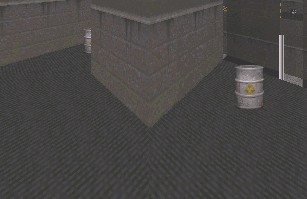
While cranes can pick up any graphical sprite, some behave strangely and won't go all the way to the floor when dropped. From here, it's a matter of trial and error if you want to use other sprites. NukeBarrels work well and they spill a puddle of radioactive sludge when shot (not on moving floors or in mid-air though).
Go to 3D mode and change the floor texture of the sectors to tile #1156. It might be necessary at this point to make the floors Relatively Aligned by using the [R] key while pointing at them with the mouse cursor. Make sure that the lines in the belt are oriented the right way and that, once in the game, the belts are moving in the same direction as the floor. If not, restart Build and use the [R] key again, save and restart the game. You may have to go back and forth several times until they all work properly. Unfortunately, there is no other way to do this.
A few words on the behavior of cranes:
• As soon as any object enters the sector containing the cranepole sprite, the crane initiates the pickup an drop sequence even if the object leaves the sector before the crane arrives.
• Objects are picked up on a first come-first served basis when entering the cranepole sector although it is possible for the player to jump on top of the object in order to picked up first.
• If Duke is looking in another direction before being picked up by the crane, he will be instantly turned around to face direction of travel once picked up. He can look or aim up and down and shoot while in the crane but cannot turn around.
• Any destructible object can be shot at and destroyed while carried by the crane. Also, if you shoot at the crane in a particular spot with bullet projectiles, you will hear a ricochet sound and it will drop the object it is carrying in mid-travel. Often, monsters which have been picked up by the crane free themselves this way (while trying to shoot Duke) and so can Duke.
• When Duke enters the cranepole sector while flying with the jetpack, the crane pickup sequence is initiated but he won't be picked up. He will temporarily be driven all the way to the floor either by the crane or by an object that can't be picked up (like barrels) when standing in the drop zone while the object passes over his head.
•
It is possible to use the jetpack to fly up to the crane and
pick up any weapon, ammo, gear or health it is carrying while in transit. If you fly all
the way up the ceiling of the track sector and stand in its path, it will stop until you
move out of the way.
• Cranes are, of course, indestructible but cannot harm Duke either. They can be used for going up places too high to jump to if you don't have a jetpack, for delivering pipebombs to your opponents and setting off laser tripbombs.
• It is also possible to hop on a crane that has already picked up an object and and walk along while it moves to get to its destination (a bit tricky though).
Limitations of cranes:
• Cranes work well as long as their path is orthogonal to the map grid, if you give them a diagonal or angular path, they will behave erratically.
• Cranes only move in a straight line and will pickup any object present in the cranepole sector, even if that sector is much larger than the track sector and the object is far from the cranepole sprite. It simply snaps to where the crane lowers. This is somewhat strange. In order to keep things realistic, make your pickup sectors small.
• The speed of cranes cannot be altered.
• Aliens can be picked up by the crane although it's very hard to get them to stay in the pickup sector long enough for that to happen. Unless, of course, you place an alien stayput sprite in the pickup sector in Build. In that case, make the sector large enough to contain it, otherwise the crane might behave erratically.
• If one does get picked up by chance and you want to kill it in transit, unless you're a crack shot, forget projectile weapons, use the RPG. Cranes move relatively fast.
• Some sprites like rubbercans and statues don't drop all the way to the floor when released by the crane and can become permanent obstacles in the game. Sprites that work well are weapons, ammo, gear, health and pipebombs, of course. Experiment and find what works best.
Lightning is one of the easiest Sector Effectors to create. It of course is only available with the Plutonium Pak, so if you're running the 1.3 version, you'll need to upgrade. It's worth it, believe me.
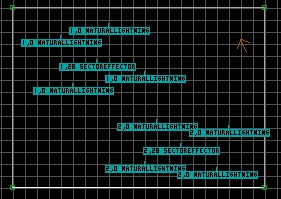
Start out making your sector, a single big one will suffice here. Insert two Sector Effectors, and change their lotags to 28. Insert 8 NaturalLightning sprites (tile #4890), four to each SE-28. You can have more than four per SE-28; I'm keeping it small for now. Place them in a circle fashion around the SE-28. For one group of SE-28 and lightning bolts, change all of their hitags to 1. For the other group, change all of their hitags to 2. When the lightning "strikes", it will randomly jump to the positions of the matching lightning bolts you placed.
This Sector Effector applies only to the PPak; it is not available with the 1.3 version of Duke3d.
Create three sectors, two room-sized sectors and a dividing door-like sector. We're going to have the middle door-like sector lower incrementally from the ceiling so that we can pass through.
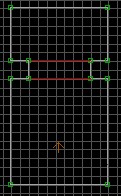
Insert an Activator and a Sector Effector in the door-like sector. Place a switch on the wall nearby. Change
the Sector Effector lotag to 18. Change the Activator lotag to a unique switch number; I'm
using 1 here. Give that same
number to the switch lotag.
The Sector Effector hitag is the
rate at which the sector will move. Setting this hitag to 1 will cause the sector to
lower one unit at a time. One unit is defined as one PgUp or PgDn in Build.
Set the Sector Effector hitag to 2.
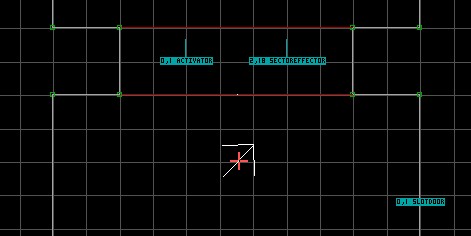
Switch over to 3d mode and move the SE-18 all the way to the ceiling. Change the SE-18 palette to 1, by pointing at it and hitting [ALT] +P. Changing the palette to a number other than 0 will cause the sector to start at the SE-18 height when playing the game, and then move to where the sector height is in Build. Otherwise, the sector would start where it is in Build, then move incrementally to the SE-18 height when playing the game.
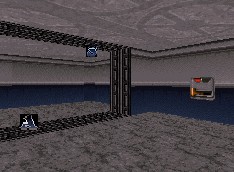
The SE-18 sprite can also move the ceiling. Simply change the angle of the SE-18 sprite so that it points downwards. You might be wondering exactly what value the SE-18 sprite would be. In our example, we've only got one switch, and it takes 10 or so flips to lower the sector floor down. Seems kinda tiring to the player, doesn't it? You can use Touchplate sprites scattered about to do the lowering, setting their hitag to 1 so they only activate once. That way, Duke will have to walk across multiple
areas to lower it all the way.
Another example: say you have a room with 4 dipswitches mounted about. As soon as Duke walks in, a Touchplate sprite closes the door behind him. One of the dipswitches opens another door to get out. The other 3 are linked to a SE-18 and cause the ceiling to lower by 20 notches... but the ceiling is only 40 notches over the floor. Two wrong guesses and Duke's toast :) Play with it, and see what you can come up with.
BUILD Dox
This came straight out of the BuildHlp program. I'm duplicating
it here for your reference.
Original Build Docs written by Allen H Blum III & Richard "Levelord" Gray.
3d Edit Mode Keys
F1
Help. Brings up a display of some special keys to use in 3d mode. Press F1 again to hide the display.
ESC
Quit
Keypad ENTER
Flip to 2d mode
Mouse
Pointer movement
Arrows
Movement like in the game
Caps Lock
A and Z keys controls
Mode 0: Game mode (default)
Mode 1: Height lock mode
Mode 2: Float mode
PgUp/PgDn
Raise or Lower a ceiling or floor. If you point at a wall, the ceiling of that sector will move. Highlighting multiple sectors in 2d mode will allow you to move all of those sectors simultaneously.
Ctrl-PgUp/Dn
For sprites only, puts sprites exactly on the floor or exactly on the ceiling.
V
Tile selection. Use the arrow keys to select a tile from your map's tile group. Press V again to bring up the entire tile listing. Press ENTER to select a tile, or ESC to back out.
/ and *
In Tile Selection mode only. Increases/Decreases the size of the thumbnail images.
ALT-V
Height selection. Works just like V, but this selects the groudraw height map.
2,4,6,8 (Keypad)
Repeat values (tile smooshiness.) Think of these keys as arrow keys controlling the bottom-right corner of the bitmap. Normally, this is used for walls and sprites. If you select a floor or ceiling, the tiles will shift, but not smoosh.
Shift + 2,4,6,8 (keypad)
Panning values (offset into the tile.) These keys are useful for aligning tiles of multiple sectors.
/
Use this key to reset panning/smooshiness of a tile.
5 (keypad)
If you hold down this key while using the 2,4,6,8 keys on the keypad, the values will align at multiples of 8.
>
This key attempts to match up all of the tiles along a wall. It scans along the walls towards the right as long as the tiles are the same as the chosen wall. Some walls may not work right, especially floor/ceiling steps. Sometimes build will lock on machines with lower amounts of memory when using this function.
['] + [T]
Sets the lotag for the object you're pointing at: sprites and sectors. Point at the sector floor to set its lotag.
['] + [H]
Same as above, except it sets the hitag.
['] + [S]
Changes the shade value of a sprite, ceiling, floor, or wall.
F
Flip an obejct. For sprites and walls, this flips the object x-wise. For ceilings and floors, the objects are flipped in 8 possible ways. Just keep pressing [F] to go through the 8 different ways.
Alt-F
When you use relative alignment mode on ceiling and floor textures, you can press Alt-F to choose a new wall to align to. It actually rotates the walls of a sector by 1.
Alt-P
Changes the palette of a wall/ceiling/sprite. Valid ranges are 0-25. 4 is solid black. 0 is the default color for that tile. Not all values change the color for certain tiles.
O
Wall orientation (whether it starts from the top or bottom.) Normally, walls are oriented from the top. For example, if you hold down 2/8 on the keypad in 3d mode, the wall always starts from the top. Orientation works differently for white lines and red lines, so if a wall doesn't look right, just press [O] anyways to see if it fixes it. This is especially true of glass walls- press [O] once on the tile above the glass wall if it gets screwed up when you shoot the glass in the game.
TAB
Copy. Copies the attributes of the pointed-at sprite/tile into the clipboard. The attributes it remembers are: tile, shade, x-repeat. y-repeat. and cstat values.
Left ENTER
Paste. Paste the stored attributes over the pointed-at sprite/tile. Whenever you press ENTER, the y-repeat values stay the same, and the x-repeat values are adjusted so the pixels of the bitmaps have a square-aspect ratio.
Ctrl + Left ENTER
Pastes the attributes to every wall in a loop when a wall is pointed-at.
Shift + Left ENTER
Pastes the shade only to the pointed-at wall or sprite.
Ctrl + Shift + ENTER
Auto-shade a sector. First make any wall of the loop as light as the lightest shade you want. Then make any other wall of the loop as dark as the darkest shade you want. Finally press Ctrl-Shift-ENTER on the wall that should be the lightest. Now the loop should be smoothly shaded. If it doesn't work, you may need to insert more points on the walls.
Sector Flags:
P
Make the ceiling of the given sector have a parallaxing sky. Press [P] again to return it to normal.
G
Make the floor of the given sector have a Groudraw (floor with height mapping.) They do not recommend using this attribute extensively yet. (See the H key for selecting the height map)
E
An option for ceilings and floors. If for some reason, you want a tile to be smooshed into the normal 64*64 area, press [E] to unExpand the tile. Press [E] again, and the tile will be expanded, so the pixel size is the same as the normal 64*64 ceiling/floor.
R
Relative alignment. Allows floor/ceiling textures to align to the first two points of a sector. Textures will rotate/pan with moving sectors properly. This is especially useful for subway floors.
Wall Flags:
B
Make an invisible wall, such as a window, block you from going through. Since the wall is invisible, you need to point at the tile right above the window, or the tile below the window. Note: pressing B on a wall will take off any hitscan you may have placed on it.
T
Press to make a maskable wall 50/50 translucent.
M
Make a maskable wall. Point at the tile below or above the window to set. The wall takes all of its attributes from the front of the wall, so it must have the same repeat, panning, and cstat values as the walls above or below it. The masking is added to the other side as well, with the image flipped.
Shift-M
Same as above, except the wall is one-sided.
1
Make a 1-way wall.
2
Some walls have two different sections (like the tiles above and below a window.) Normally they always have the same attributes. It is possible though to give both the top and bottom different attributes by pressing 2 on that wall. They then become separately editable.
H
Toggle the hitscan bit. Default is pass-through. Very useful for glass walls.
Sprite Flags:
S
Press S to insert a sprite. Pointing at a wall will create the sprite so that it's flat against the wall.
R
Press R on a sprite to change its fixation. Pressing R once will make the sprite fixate vertically, like a poster. Pressing R again will make the sprite fixate horizontally, like a flat rug. Pressing R a third time will make the sprite follow your viewpoint.
B
When the mouse cursor is on a sprite, this makes the sprite block you from walking through. Also makes the sprite sensitive to hitscan. Sprites with the [B] attribute will appear pink in 2d edit mode.
T
Press to make a sprite 50/50 translucent. Press T again to put sprite back to normal mode.
2d Edit Mode Keys:
ESC
Brings up the file menu - (N)ew (L)oad (S)ave (Q)uit. Press ESC again to exit the menu.
F5
Weapons/Health sprite summary for your map.
F6
Alien sprite summary for your map.
F7
Small listing of the different Sector Tags... sometimes it will display the Sector Effectors.
Keypad ENTER
Flip to 3d mode
Mouse
Move mouse cursor
Left mouse button
When holding this button down, you can drag existing points and sprites.
Right mouse button
Moves the player's viewpoint (white arrow). Press this button anywhere in your level and the player's viewpoint for 3d mode will be at that spot.
Right Shift
Select a bunch of points to drag around. Press and hold right shift then move the mouse cursor to enlarge the box.
Ctrl + Right Shift
Press this combo within a room to highlight all points of that room, so that you can drag them all in one motion.
Right Alt
Select a bunch of sectors for either duplication or dragging around. Press and hold right alt then move the mouse cursor to enlarge the box.
Arrows
Move player's viewpoint in the appropriate directions. The player will be clipped. To move to another portion of the map, use the right mouse button.
Space
Press to begin drawing of a new sector. There are several ways to draw a new sector:
1. Drawing a full loop- that is, whenever the new sector meets the old sector, draw over that line again. In full loop mode the new sector must not already be in another sector. The loop is done when you press the space bar at the first point again.
2. Splitting a sector - press space bar to draw points at which you want to split a sector. The points (aka vertices) must already be in place to split a sector. Press INSERT to add points on an existing line. You must end the split on another wall of the starting point's sector, and you cannot cross any red lines when drawing.
3. Drawing a sector completely inside a sector (like columns.) To do this, just press space bar at every point in the loop. Do not make the column valid player space (Alt-S) if the column is never to be walked over/under.
Backspace
When plotting points with the space bar, you can use backspace to get rid of the last point plotted. You can press the backspace key all the way to the beginning point, if you decide not to make the sector at all.
Insert
Inserts a new point at the midpoint of the highlighted line. Then you can drag the point to wherever you want, or draw a sector from that point. If a bunch of points are selected (see right Alt) then instead of inserting points, the selected sector bunch will be duplicated (stamped.) Don't forget to drag the selected sectors after stamping.
Delete
Use this to delete sprites (blue/purple circles.) To delete points of a sector border, you can't use delete. Instead, drag the point to be deleted onto one of its 2 neighbor points on the loop. This is only possible with grid-locking on.
Right Ctrl-Delete
This deletes the whole sector that the mouse cursor is in. Note that the right Ctrl for protection. Do not attempt to use this on sectors inside sectors, you may end up deleting the parent sector. Instead, join (see J) that inner sector with its parent, then delete them both.
J
Use to join neighboring sectors. They must share at least one red line. Press J when the mouse cursor is over the first sector, then press J again on the second sector. The attributes of the new combined sector will be taken from the first sector selected.
Alt-S
When you have a white loop inside a sector, you can press Alt-S when the mouse cursor is inside it to turn the sector into valid player space (red lines.)
S
Inserts a sprite in the location under the mouse cursor. Pay attention to areas with sectors over sectors. The newly inserted sprite will default to the lowest physical sector if your cursor is positioned in a spot where two sectors overlap.
B
Blocks/Unblocks the player from walking through a wall or sprite. A blocked wall or sprite will appear pink in 2d edit mode.
C
Turn a line into a circle defined by the short line segments. First press C on the highlighted wall, then move the cursor to the furthest radius position. Pressing C again will cancel the circle. Pressing +/- will change the number of points on the circle. Press the space bar to finally create the sector.
+/-
Increase/Decrease the number of points on a circle (only works when you're creating the circle.)
T
Type in the lotag for a sector. Move the cursor to the inside of the sector to be tagged.
Alt-T
Changes the lotag for sprites and walls.
H
Type in the hitag for a sector. Move the mouse cursor to the inside of the sector to be tagged.
Alt-H
Changes the hitag for sprites and walls.
E
Change the sprite's status list number. (Not sure on the functionality of this.)
> and <
Change angle of sprites. Move the cursor over the sprite to be angled. Use shift-> and shift-< for more precise angles. If you highlighted sectors, the sectors will be rotated.
Ctrl-T
Turn tag display on/off.
TAB
Shows the attributes of a sector. Move the mouse cursor inside the sector to be viewed. Press TAB again to hide the attributes.
Alt-TAB
Same as above, except for sprites and walls.
Scroll Lock
Sets the player start position (brown arrow) to your current viewpoint position (white arrow.)
A,Z
Zoom in/out.
G
Change grid resolution. The grid cycles through this sequence: off, 1x, 2x, 4x (default), 8x and 16x.
L
Turns grid-locking on or off. If the mouse cursor is pink then grid locking is on. If it is white then grid locking is off. There is no grid locking if the grid is turned off.
EditArt Keys
U
Use this to import a section of a 320x200x256 .BMP, .PCX, or .GIF image. GIF images import best.
Enter - Convert the image that is inside the rectangular selection box to the Build Palette.
Space - Convert the image that is inside the rectangular selection box without remapping the palette.
P - If in the picture selecting screen (after pressing U and loading the picture) you press P, then the palette of Build can be replaced by the palette of the displayed picture.
PgUp/Dn
Select tile to edit (4096 tile maximum)
G
Goto a tile by typing in the tile number.
S
Re-size a tile. The X and Y sizes can be any unsigned short integer. X ranges from 0 to 1024, and Y ranges from 0 to 240.
Delete
Shortcut key to set both the X and Y sizes to 0.
+,-
Change the animation setting. Default is 0: NoAnimation. To change the animation type, press - when the value is 0. Example: if you want an object to have four tiles of animation, you can animate it in 4 different sequences: (0 is the first tile)
NoAnm=4 - sequence: 0,0,0,0...
Oscis=4 - sequence: 0,1,2,3,2,1,0,1,2,3 (Oscillate)
AnmFD=4 - sequence: 0,1,2,3,0,1,2,3,0,1 (Forwards)
AnmBK=4 - sequence: 0,-1,-2,-3,0,-1,-2,-3 (Backwards)
See the EditArt basics page for more info.
A
Set the animation speed of the tile. Press + and - to change the animation speed. There are 16 different animation speeds. The animation speed set in EditArt sets the speed for Build and the Game.
~
Centers a sprite. Simply use the arrow keys to get to the desired position.
N
Name a tile. The sprites will have their name appear in 2d edit mode if Tag Boxes are turned on (Ctrl-T)
O
Optimize the size of an individual piece of artwork. Use this for tiles with invisible (masking) pixels on the sides.
V
View and select a tile to edit.
Space - To swap 2 tiles simply press space bar on the first tile,
then space bar on the second. Doesn't work too well across
TILE boundaries... ie TILES013.ART to TILES014.ART.
1,2,3 : To swap a group of tiles, press 1 on the first tile, press 2 to remember the region between where you pressed 1 and 2. Press 3 at the place to where you want to swap all the tiles.
Alt-U
Re-grab artwork from original pictures according to the CAPFIL.TXT file. If you press Alt-U in the main screen, everything will be re-grabbed. If you press Alt-U in 'V' mode, then you should first select the range by pressing 1 and 2 on the range boundaries.
Alt-R
Generate a tile frequency report by scanning all maps in directory. Use in 'V' mode only.
F12
Screen capture. Saves image as a *.PCX file, starting as file name CAPTxxx.PCX and incrementing by 1 each time F12 is pressed.
ESC
Quit
Sector Effector Reference Guide
SE 0 Rotate Sector
Used to rotate a sector around a pivot point.
Hitag: Set equal to Hitag of SE 1 as pivot point for sector.
Sector Lotag: none
Angle: Up = Rotate all points around SE 1. Down = Rotate sector around SE 1
Shade: none
Palette: none
Comments : If Relative alignment is set on the floor (the R key) then all sprites and actors on the floor will rotate with the sector.
SE 1 Pivot for Rotate SE 0
Used as a pivot point for Sector Effector 0 to rotate a sector around
Hitag: Set equal to Hitag of all SE 0 to rotate
Sector Lotag: none
Angle: Up = Rotate clockwise. Down = Rotate counter-clockwise
Shade: none
Palette: none
Comments:
SE 2 Earthquake
Used to set off an earthquake. During the earthquake, the screen will shake for about 4 seconds. The sector will move in the direction that the SE sprite is pointing. If there is a slope, then it will rise during the earthquake.
Hitag: none
Sector Lotag: none
Angle: Direction to move sector during earthquake
Shade: none
Palette: none
Comments: Must activate with Masterswitch. If there is a slope, then it will be made flat at pre-map and raised during the earthquake to a maximum height of 4 clicks.
SE 3 Random lights after shot out
Used to create lighting effect when lights are shot out. It will also set the color of light when the light is on. Make the sector shade dark when the light is out and make the SE sprite shade bright when the light is on.
Hitag: Set equal to Wall Lotag with graphic of Light or Set equal to Ceiling Hitag with graphic of Light.
Sector Lotag: none
Angle: none
Shade: Set to brightness when light is on, set sector brightness to when light is off .
Palette: Set to palette lookup number when light is on
Comments: Can be used with SE-12 to be turned on and off with a light switch until the lights are shot out. The light's color is taken from the SE sprite's Palette when the light is on, and the sector's palette when the light is off. Default is no color (eg palette=0). Both the SE sprite and the sector can have different palettes.
SE 4 Random Lights
Used to make sector randomly flash in brightness. It will also set the color of light when the light is on. Make the sector shade dark when the light is off and make the SE sprite shade bright when the light is on.
Hitag: Set for Random Flash number
Sector Lotag: none
Angle: none
Shade: Set to brightness when light is on, set sector brightness to when light is off.
Palette: Set to when light is on
Comments: Can not be used with SE-12 to be turned on and off with a light switch. The light's color is taken from the SE sprite's palette when the light is on, and the sector's palette when the light is off. Default is no color (e.g. palette=0). Both the SE sprite and the sector can have different palettes.
SE 6 Subway Engine
Used as the Engine for a Subway. Use with SE-14 for multiple subway cars. Must be used with Locator Sprite to set track.
Hitag: Set equal to Locator Lotag for starting position
Sector Lotag: Set equal to 31 to have sectors within sectors for your cars. Every sector within the car must have the 31 tag.
Sector Hitag: All sectors within Car sector must be equal
Angle: Set for direction of Subway
Shade: none
Palette: none
Comments: Set relative alignment on sector floor (R key) to make sprites move. If a Locator has a Hitag of 1, then the subway will stop at that locator for 5 seconds then continue.
SE 7 Transport/Water
Used as a Teleporter and Water Effect
Hitag: Set equal to one other SE-7 to Transport to
Sector Lotag: 0 = Teleporter. 1 = On top of water. 2 = Underwater
Angle: none
Shade: none
Palette: 0 = Water. 8 = Green Slime
Comments: If the Sector Effector Sprite is off the floor, then you will only teleport when Duke's waist is at the same height as the sprite and in the same sector. When using with Sector Lotag 1 and 2 as water, the two sectors must be exactly the same size or you will teleport to death.
SE 8 Up open Door Lights
Used to light up a room when a door is opened.
Hitag: Set equal to all other SE-8 used together
Sector Lotag: Use with any that raises the ceiling (e.g. Sector Lotag 20)
Angle: none
Shade: Set to brightness when light is on, set sector brightness to when light is off.
Palette: none
Comments: At least one SE-8 with equal Hitag must be in a sector in which the ceiling raises
SE 9 Down Open Door Lights
Used to light up a room when a light comes down from the ceiling
Hitag: Set equal to all other SE-9 used together
Sector Lotag: Use with any that lowers to floor (e.g. Sector Lotag 21)
Angle: none
Shade: Set to brightness when light is on, set sector brightness to when light is off
Palette: none
Comments: At least one SE-8 with equal Hitag must be in a sector in which the floor rises
SE 10 Door Auto Close
Used to automatically close a door after a set delay
Hitag: Delay until door closes (e.g. 128 equals 4 seconds)
Sector Lotag: Use with all door Sector Lotags
Angle: none
Shade: none
Palette: none
Comments:
SE 11 Rotate Sector Door
Used as a door that rotates 90 degrees when activated
Hitag: none
Sector Lotag: 23
Angle: none
Shade: none
Palette: 0 = Clockwise. 1 = Counter-clockwise
Comments: Will also activate other SE-11 with equal Hitag values
SE 12 Light Switch
Used to light up a sector when activated with a switch
Hitag: Set equal to all other SE-12 used together
Sector Lotag: none
Angle: none
Shade: Set to brightness when light is on, set sector brightness to when light is off
Palette: Set to when lights are on
Comments: The light's color is taken from the SE sprite's palette when the light is on, and the sector's palette when the light is off. Default is no color (e.g. palette = 0). Both the SE sprite and the sector can have different palettes
SE 13 C-9 Explosive
Used to blow apart the ceiling and floor of a sector to create holes in walls
Hitag: Set equal to SEENINE, OOZCAN, or CRACK sprites to activate
Sector Lotag: none
Angle: Up = both ceiling and floor come together at pre-map. Down = only the ceiling or the floor matches the height with the SE sprite depending on which one is closest.
Shade: none
Palette: none
Comments: Can be activated by a Masterswitch with equal Hitags. If the ceiling has a Sky texture without Parallax set, then the tile will be replaced at pre-map with the closest non-sky texture. When it explodes, the sky will change to Parallax.
SE 14 Subway Car
Used as the car for a Subway. Use with SE-6 for Subway Engine. Must be used with Locator Sprite to set track.
Hitag: Set equal to Locator Lotag for starting position
Sector Lotag: none
Sector Hitag: All sectors withing Car sector must be equal
Angle: Set for direction of Subway
Shade: none
Palette: none
Comments: Set relative alignment on sector floor (R key) to make sprites move. If a Locator has a Hitag of 1, then the Subway will stop at that Locator for 5 seconds then continue.
SE 15 Slide Door
Used as a door that slides when opened
Hitag: Set equal to other doors to be opened at the same time
Sector Lotag: 25
Angle: Set to direction when door is closed
Shade: none
Palette: none
Comments: Speed sprite sets distance to door to open. Use MusicSFX sprite for sound.
SE 17 Elevator Transport
Used as an Elevator that transports from one elevator shaft to another to simulate going straight up from one floor to another.
Hitag: Equal to one other SE-17
Sector Lotag: 15
Sector Hitag: 0 = Bottom Floor. 1 = Top Floor.
Angle: none
Shade: Darkest shade of the two SE-17 with equal Hitag is the starting floor for the elevator. Make the shade at least 30 units dark.
Palette: none
Comments: Top and Bottom floors must be physically built at proper height difference to work properly. Both Elevators must be exactly the same size.
SE 19 Shot Touchplate Ceiling Down
Used to close ceiling when a shot or explosion hits within the sector.
Hitag: Equal to others to activate at the same time
Sector Lotag: none
Angle: none
Shade: none
Palette: none
Comments: Does not check to see when a shot or object passes through the sector without hitting. Use MusicAndSFX sprite for sound
SE 20 Bridge
Used to stretch a sector when activated
Hitag: none
Sector Lotag: 27
Angle: Set to direction to stretch sector
Shade: none
Palette: none
Comments: Set relative alignment (R key) on sector to move floor. Use speed sprite for distance
SE 21 Drop Floor
Used to make a floor or ceiling drop to the height of the SE sprite when activated by a Masterswitch
Hitag: Set equal to others that activate at same time
Sector Lotag: 28
Angle: Up = Drop Ceiling. Down = Drop Floor
Shade: none
Palette: none
Comments: Floor or ceiling matches height of SE sprite at pre-map then drops to set position when activated. To do opposite, the SE sprite height must be put into sector
SE 22 Prong
Used as Door inside Teeth Prongs
Hitag: Set equal to Hitag of Sector Lotagged 29
Sector Lotag: 0, Outside Sector Lotag of 29
Angle: none
Shade: none
Palette: none
Comments: This Effector was not tested in the game, so use it at your own risk. It may cause problems in multi-play. See _SE.MAP for usage.
SE 24 Conveyor Belt
Used to move sprites along the floor like a conveyor belt
Hitag: Set equal to a switch to turn on and off
Sector Lotag: none
Angle: Set to direction to move sprites
Shade: none
Palette: none
Comments: Set relative alignment (R key) on sector floor to move sprites. Set speed sprite equal to rate of movement
SE 25 Engine Piston
Used as a Piston that only goes up and down
Hitag: none
Sector Lotag: none
Angle: none
Shade: none
Palette: none
Comments: Put SE sprite height to starting position of Piston. Speed sprite equals rate of movement.
SE 27 Camera for Playback
Used as as camera position to view playback of game Demos
Hitag: Set to maximum distance for the camera to view the action of other players (e.g. 2048 equals largest grid in Build)
Sector Lotag: none
Angle: none
Shade: none
Palette: none
Comments: Camera does not always work well with extreme heights
SE 29: Floating Sector
Used to make sector float like water or waves
Hitag: Set to starting height of sector (0-2047)
Sector Lotag: none
Angle: none
Shade: none
Palette: none
Comments: Use speed sprite to set height of wave. To use as a wave, the sector must only be made of 4 lines. Set one wall as first wall (ALT-F) next to another sector with a SE-29 sprite in it to create a wave.
SE 30 Two-way train
Used as a train car that only goes back and forth from point A to point B
Hitag: Set equal to a switch to activate
Sector Lotag: 31
Angle: Set to direction of front of car
Shade: none
Palette: none
Comments: Use with 2 Locator sprites to define track. Activator with equal hitag activates when car stops at point A. Activator with equal hitag+1 activates when car stops at point B
SE 31 Floor Rise
Used to rise or lower sector floor when activated by an Activator or Masterswitch
Hitag: none
Sector Lotag: none
Angle: Up = Start sector height equal to SE sprite height at pre-map. Down = Rise sector to SE sprite height when activated.
Shade: none
Palette: none
Comments: Use speed to set rate of rise. Use MusicSFX sprite for sound.
SE 32 Ceiling Fall
Used to rise or lower sector Ceiling when activated by an Activator or Masterswitch
Hitag: none
Sector Lotag: none
Angle: Up = Rise sector to SE sprite height when activated. Down = Start sector height equal to SE sprite height at pre-map
Shade: none
Palette: none
Comments: Use speed to set rate of rise. Use MusicSFX sprite for sound
SE 33 Spawn Earthquake Jibs
Used to spawn pieces of metal and rock from SE sprite during an Earthquake
Hitag: none
Sector Lotag: none
Angle: none
Shade: none
Palette: none
Comments: Jibs will be spawned whenever an Earthquake occurs anywhere on the map
SE 36 Spawn Shot
Used to spawn a shot every five seconds when activated by a Masterswitch
Hitag: none
Sector Lotag: none
Angle: Set to direction to shoot
Shade: none
Palette: none
Comments: Once activated, it will never stop shooting. Use speed sprite to set object to shoot:
2556: Shrink Ray
2605: RPG
1650: Mortar
1625: Trooper Laser
1636: Lizman Spit
Special Sprite Reference Guide
![]()
Sector Effector: Sprite #1
The Sector Effector Sprite is used to create game effects and manipulate sector attributes. The SE is the main tool to create effects such as Earthquakes, Explosions, Lighting Effects, etc. Place a Sprite #1 in the sector to effect.
Lotag: Lots. See the Sector Effector Reference Guide for more specific details on all the effects you can do.
Hitag: Set equal to other SE Sprites with same Lotag to activate together. Certain effects require other sprites to have this hitag as well.
Activator: Sprite #2
The Activator Sprite is used with Switches or the Touchplate sprit to activate the Sector Lotag function or any Sector Effectors within the Sector.
Lotag: Set equal to a Switch lotag or a Touchplate lotag.
Hitag: none
Touchplate: Sprite #3
The Touchplate will activate an Activator or a Masterswitch Sprite when the player walks on the sector floor.
Lotag: Set equal to an Activator or a Masterswitch lotag
Hitag: 0 = Activate touchplate everytime player walks on the sector. Greater than 0 = The touchplate will only activate this many times when the player walks on the sector, then never again.
Activator Locked: Sprite #4
The Activator Locked sprite will lock the sector's lotag function so it can not be activated by the player until it is unlocked with a switch.
Lotag: Set equal to a Switch's lotag to be toggled locked and unlocked.
Hitag: none.
Music And SFX: Sprite #5
The Music and Sound Effects Sprite can be used in 3 ways.
1. Activation Sound: When used in a sector with a Lotag, it will play a sound when the sector's lotag function is activated.
Lotag: Sound number
Hitag: none
2. Ambiente Sound: When used in a sector with no lotag, it will play an ambiente sound.
Lotag : Ambiente sound
Hitag : Max distance the sound can be heard. 1024 equals the largest grid square size in build. This number could reach 10000 for larger areas.
3. Echo Effect: When used in a sector with no lotag, it will cause all sounds to have an echo effect.
Lotag: 1000 + the amount of echo from 0-255
Hitag: Max distance the sound can be heard. 1024 equals the largest grid square size in build. This number could reach 10000 for larger areas.
Locators: Sprite #6
The locator sprite can be used to define a track for a Subway (SE-6 & SE-14) or to define a path for PigCop Recon Cars but not both in the same map. Plus you can only have a single path defined in a map.
Lotag: Set in an increasing order starting from 0 with no gaps in the count for all the Locator Sprites in the map. When the Subway or PigCop Recon Car reaches the last Locator sprite, it will loop back to the Locator sprite with a lotag of 0.
Hitag: If set to 1 (or any number greater than 0) the Subway will stop at the Locator sprite location for 5 seconds, then continue to the next Locator. The PigCop Recon Car is not affected.
Cycler: Sprite #7
The Cycler Sprite is used to make the Sector Floor, Walls, and Ceiling pulsate in brightness.
Lotag: Set the offset of how bright it will start.
Hitag: none
Palette: Set to a color if needed.
Shade: Set to how bright the sector will get. Set the sector brightness to how dark it will get.
Masterswitch: Sprite #8
The Master Switch Sprite is used to activate a Sector Lotag or a Sector Effector after a time delay. This can only be acitvated by a Touchplate sprite.
Lotag: Set equal to a Touchplate Sprite Lotag to be activated by.
Hitag: Set for time delay until activation of Sector Tag or Sector Effector Sprite.
Respawn: Sprite #9
The Respawn Sprite is used to Teleport in Actors and Items when activated by a Touchplate Sprite.
Lotag: Set equal to Touchplate Sprite Lotag to be activated by.
Hitag: Set equal to any Sprite Number that has a name with it in Build or Editart.
GPSpeed: Sprite #10
The GPSpeed Sprite is used to define the rate of movement for such things as Sector Tag 20 (Ceiling Door) and Sector Effector 0 (Rotate Sector.) Can be used in certain cases to determine the length of movement as well (Sliding Doors.)
Lotag: Set to rate.
Hitag: none
Access Switch: Sprite #130
The Access Switch is used to unlock or activate something when used with a Key Card. Use the Palette on both Access Switch and Access Card to define what card to use (0 = Blue, 21 = Red, and 23 = Yellow.)
Lotag: Set equal to Activator or Activator-Locked Sprite Lotag to use.
Hitag: Set to play sound when activated (212 is common.)
Switch: Sprite #132 and all other Switches
The Switch is used to unlock or activate something when activated by the space key.
Lotag: Set equal to Activator or Activator-Locked Sprite Lotag to use.
Hitag: Set to play sound when activated.
Palette: 0 = Default, 1 = Multi-play only
Nuke Button: Sprite #142
The Nuke Button is used to end a level and goto the stat screen. It can also be used to go to a bonus level.
Lotag: Set to 32767 to end a level and go to stat screen. Set to 1-11 to go to a bonus level in the same volume.
Hitag: none
Palette: 0 = Default, 14 = Bonus Level
Multiswitch: Sprite #146
The Multi-Switch can activate 4 multiple Activator Sprites. It uses 4 consecutive Lotags to activate each Activator. When first switched, it activates Activator Sprites A and D. The next time it activates Activator Sprites A and B, then B and C, C and D, then back to A and D again.
Lotag: Set equal to Activator Sprites A, B+1, C+2, and D+3.
Hitag :none
Doortile 5: Tile #150 and all other Doortiles
The Door Tiles can be used to activate Activator Sprites when the player presses upon the wall.
Wall Lotag: Set Equal to Activator Sprite Lotag to activate.
Wall Hitag: none
Dipswitch: Sprite #162
The Dip Switch is used as a combination switch with an Activator or Activator Locked Sprite. All Dip Switches with equal Lotags will be used for the combination.
Lotag: Set equal to Activator or Activator Locked Sprite Lotag.
Hitag: 0 = Set to off, 1 = Set to on
View Screen: Sprite #502
The View Screen is used to view through Cameras (Sprite #621) placed around the map. It will view through all Cameras with equal Lotags.
Lotag: none
Hitag: Set equal to Camera1 Sprites #621.
Crack1: Sprite #546 and all other Cracks
The Crack Sprite is used to activate explosions (SE-13) and other effects.
Lotag: none
Hitag : Set equal to SE 13 Hitag to Activate. See the Explosions tutorial for more details.
Palette: Set to 1 for Multi-Play mode only
Mirror: Tile #560
The Mirror tile is used to place a mirror in the map. For more details, check out the mirror Tutorial.
Camera1: Sprite #621
The Camera Sprite is used to be able to view through using the ViewScreen Sprite.
Lotag: Set equal to the ViewScreen Sprite Hitag to be viewed through.
Hitag: Set to amount of turning radius. 0 equals none, 2048 equals 360 degrees. See the Camera tutorial for more info
Shade: Set to angle of facing down.
Angle: Set to direction to point.
Cranepole: Sprite #1221
The Cranepole sprite is used as a pickup or destination point for the Crane sprite.
Lotag: None
Hitag: Set equal to the Crane sprite Hitag
Attributes: Set to blocking
Crane: Sprite #1222
The Crane sprite is used as a starting point and drop zone for Cranes.
Lotag: None
Hitag: Set equal to the Cranepole sprite Hitag
Angle: Set to direction of travel towards Cranepole Sprite
Can With Something: Sprite #1232
The Can With Something is used to spawn an object when it is shot.
Lotag: Set to Sprite number with a name in Build or EditArt to spawn when shot.
SeeNine: Sprite #1247
The SeeNine Sprite is used to activate Explosions (SE-13) and other effects. It can also be used to timedelay explosions.
Lotag: Set equal to time delay until explosion.
Hitag: Set equal to SE-13 Hitag to activate.
Size: If the Sprite is shrunk in the x direction, then the sprite will not be seen in the game, but the explosion will.
FemPic1: Sprite #1280
The Fem Pics are used to activate the Respawn Sprite to spawn in any Sprite with a name in Build or Editart.
Lotag: none
Hitag: Set equal to Respawn sprite to activate
APlayer: Sprite #1405
The APlayer Sprite is used to define where all multi-players will start in the map. You must have a minimum of 7 sprites in the map for an 8 player multi-play game and a minimum of 7 sprites in the map for an 8 player Co-op game
Lotag: 0 = Multi-Player start position (Default). 1 = Co-op Player start position.
ST 1 Water
Used as Water Effect when the player walks on sector. If used with a SE-7 (Transport) sprite, then it will move the player to the underwater sector with ST 2.
SE 7 Hitag: Set equal to one other SE-7 to Transport to.
Sector Lotag: 0 = Teleporter, 1 = On top of water, 2 = Underwater
Angle: none
Shade: none
Palette: 0 = Water, 8 = Green Slime
Comments: When using with Sector Lotag 1 and 2 as water, the two sectors must be exactly the same size or you will teleport to death.
ST 2 Underwater
Used as Underwater Effect when the player moves in sector. If used with a SE-7 (Transport) sprite, then it will move the player to the above water sector with ST-1
SE-7 Hitag: Set equal to one other SE-7 to Transport to.
Sector Lotag: 0 = Teleporter, 1 = On top of water, 2 = Underwater
Angle: none
Shade: none
Palette: 0 = Water, 8 = Green Slime
Comments: When using with Sector Lotag 1 and 2 as water, the two sectors must be exactly the same size or you will teleport to death.
ST 9 Star Trek Doors
Doors that spread apart when opened like on Star Trek. Note that the wall tile on the doors will squish when opened.
Comments: Use MusicAndSFX Sprite Lotag for door open sound. Use Speed Sprite Lotag for opening speed.
ST 15 Elevator Transport
Used as an Elevator that transports from one elevator shaft to another to simulate going staight up from one floor to another.
SE-17 Hitag: Set equal to one other SE-17
Sector Lotag: 15
Sector Hitag: 0 = Bottom Floor, 1 = Top Floor
Angle: none
Shade: Darkest shade of the two SE-17 with equal Hitag is the starting floor for the elevator. Set the shade to at least 30 clicks. Check in 2d mode by hitting ALT-TAB on the SE 17 to be sure, or use ['] - [S] in 3d mode on the sprite.
Palette: none
Comments: Maximum of 2 floors. Sounds are set automatically. Top and Bottom floors must be physically built at proper height difference to work properly. Both Elevators must be exactly the same size. Put the SE-17 sprite in the same grid location on both elevator cars.
ST 16 Elevator Platform Down
Used to Lower the sector floor from current height down to the next sector of lower height. On next activation, the sector floor will rise up to the next sector floor.
Comments: Use MusicAndSFX sprite lotag for sound.
Lotag = start sound
Hitag = stop sound
Use Speed sprite lotag for rate of movement.
ST 17 Elevator Platform Up
Used to raise the sector floor from current height up to the next sector of greater height. On next activation, the sector floor will drop down to the next sector.
Comments: Use MusicAndSFX sprite lotag for sound.
Lotag = start sound
Hitag = stop sound
Use Speed sprite lotag for rate of movement.
ST 18 Elevator Down
Used to lower the sector floor and ceiling from current height down to the next sector of lesser height. On next activation, the sector floor and ceiling will rise up to the next sector.
Comments: Use MusicAndSFX sprite lotag for sound.
Lotag = start sound
Hitag = stop sound
Use Speed sprite lotag for rate of movement.
ST 19 Elevator Up
Used to raise the sector floor and ceiling from current height up to the next sector of greater height. On next activation, the sector floor and ceiling will drop down to the next sector.
Comments: Use MusicAndSFX sprite lotag for sound.
Lotag = start sound
Hitag = stop sound
Use Speed sprite lotag for rate of movement.
ST 20 Ceiling Door
Used to raise and the lower the sector ceiling from level with the sector floor up to the height of the next sector ceiling height, basically a Doom door.
Comments: Use MusicAndSFX sprite lotag for open and close sound. Use Speed sprite lotag for rate of movement. Use SE-10 to make the door auto-close
ST 21 Floor Door
Used to raise and lower the sector floor from level with the sector ceiling down to the height of the next sector floor height.
Comments: Use MusicAndSFX sprite lotag for open and close sound. Use Speed sprite lotag for rate of movement. Use SE-10 to make the door auto-close.
ST 22 Split Door
Used to raise and lower the sector floor and ceiling from level with the next sector floor and ceiling, then together until the floor and ceiling match height.
Comments: Use MusicAndSFX sprite lotag for open and close sound. Use Speed sprite lotag for rate of movement. Use SE-10 to make the door auto-close.
ST 23 Swing Door
Used as doors that swing the sector 90 degrees when activated.
Note that you can activate multiple ST 23 by giving the SE-11 sprites equal hitag values.
SE-11 Hitag: Set equal to all other SE-11 doors to open together
SE-11 Angle: Up = counter-clockwise, Down = clockwise
Shade: none
Palette: none
Comments: Sector will also rise to height of SE-11 Sprite if it is off the floor. Use MusicAndSFX sprite lotag and hitag to door open and close sound, respectively.
ST 25 Slide Door
Used as a door that slides when opened
SE-15 Hitag: Set equal to all other doors to be opened at the same time
SE-15 Angle: Set to direction when door is closed.
Shade: none
Palette: none
Comments: Speed sprite sets distance for door to open. Use MusicAndSFX sprite for sound
ST 26 Split Star Trek Door
Used to do the effects of both ST 9 (Star Trek Door) and ST 22 (Split Door.) Doors will spread apart when opened like on Star Trek. Not that the wall tile on the doors will squisk when opened. Will also raise and lower the sector floor and ceiling from level with the next sector floor and ceiling, then together until the floor and ceiling match height.
Comments: Use MusicAndSFX sprite lotag for open and close sound. Use Speed sprite lotag for rate of movement. Use SE-10 to make the door auto-close.
ST 27 Bridge
Used to stretch a sector when activated.
Sector Lotag: 27
Angle: Set to direction to stretch sector
Shade: none
Palette: none
Comments: Set relative alignment (R key) on sector to move floor. Use Speed sprite for distance.
ST 28 Drop Floor
Used to make a floor or ceiling drop to the height of the SE sprite when activated by a Masterswitch
Hitag: Set equal to others that activate at the same time
Sector Lotag: 28
Angle: Up = Drop Ceiling, Down = Drop Floor
Shade: none
Palette: none
Comments: Floor or ceiling matches height of SE sprite at pre-map then drops to set position when activated. To do opposite, the SE sprite must be put into sector.
ST 30 Rotate Rise Door
Used to rotate the sector floor 90 degrees and rise to the height of the SE-0 sprite. Use SE-1 as the pivot point for the sector.
Comments: Use MusicAndSFX sprite lotag for sound. Use Speed for rate of turning. Use SE-0 sprite palette for direction:
Palette 0 = clockwise
Palette 1 = counter-clockwise
ST 31 Two-way train
Used as a train that only goes back and forth from point A to point B
Hitag: Set equal to a switch to activate
Sector Lotag: 31
Angle: Set to direction of front of car
Shade: none
Palette: none
Comments: Use with two locator sprites to define track. Activator with equal hitag activates when car stops at point A. Activator with equal hitag+1 activates when car stops at point B.
ST 10000+ One-time sound
Used to play a sound one time when the player walks on the sector floor. Tag the sector lotag with 10000+ sound number.
ST 32767 Secret Room
Used to tag the sector as a secret place to be counted at the end of the level stats.
ST 65535 End Level
Used to end the level when the player walks on the sector floor.
To change the palette of a sprite or a sector, point at the object and hit ALT-P in 3D mode. This is not documented anywhere that I can find.
When loading your own custom images using EditArt, import your graphics using the .GIF format. They tend to import better.
To find and use the correct Duke3D palette, take a screen shot with EditArt when viewing one of the tiles. Hit F12 at anytime and a .PCX image of that tile will be created named CAPT000x.PCX. Load this image using a paint program such as PaintShop Pro and save the palette to your Duke directory. When making new tiles, edit them with your paint program using the Duke palette, then saving as a .GIF file. That way, you know exactly what your tile is going to look like.
If you want to load an image using EditArt, but find the palette conversion really messed with the picture, convert the image using a more advanced paint program and the correct Duke palette (see above note.) I've found the paint programs do a better job of converting the palette to the Duke palette.
Make heavy use of the left-mouse button when editing in 3D mode. Click and hold on the sprite/tile you want to alter with the left mouse button. When adjusting floor/ceiling heights or changing their slope, this neat feature will keep that tile active for as long as you hold the button.
To raise multiple sectors' floors or lower their ceilings at the same time, select the group with the Right-ALT key in 2d mode. Switch over to 3d and raise any one of them. All will raise by the same amount.
To move multiple sprites or vertices at the same time, draw a box around them using the Right-Shift key. You can even enter 3d mode with sprites highlighted, and raise/lower them at the same time.
To change the shading of any tile or sprite, point at the image in 3d mode, hold down ['], and hit [S]. This will let you enter any number, which comes in handy for things like cameras which uses the shade for angles. Press [F1] in 3d mode to see an entire list of the ['] commands that you can do within Build. There's lots of neat little shortcuts. Also, hit [F1], [F5] and [F6] in 2d mode for other neat displays.
To replace a tile throughout your map with another tile, go to 3d mode and point at the tile you wish to use, then hit TAB. Point at the tile you want to be replaced, and hit ALT +C.
To change the visibility of a sector, point at the ceiling or floor in 3d mode, hold down ['], then hit [V]. This setting determines how far Duke can see when in the sector.
You can turn off display of Sector Effectors and Actors (aliens) in 3d mode. Hold down ['] then hit [W]. This will cycle through All Sprites, No Effectors, No Actors, and finally No Sprites at all.
You can change sprite, sector, and wall hitags/lotags in 3d mode using the ['] key. Point at the sprite, wall, or sector in 3d mode. Hold down [']. Hit [H] for Hitag, or hit [T] for lotag.
1. Extract all of the art from the original .GRP file. Type "kextract duke3d.grp *.art" in your Duke directory.
2. Run EditArt, it will go in and load all of the tiles (14 to start)
3. You'll start out on the first tile. Hit 'V' once and you'll see something very similar to Build when looking at tiles. Move to the tile you want to edit by using the arrow keys. Hit Enter on any tile and it will bring you back to the editing screen. Hit PgUp or PgDn to cycle through the tiles.
4. To jump to a specific tile, hit 'G' at any time. The user art starts at tile number 3584. Jump to this, and you'll see a little User Art tile.
5. To start a new tile, select one that's empty (3585 sounds good), and hit 'S'. This will let you enter the X and Y dimensions.
6. You'll start with a tile that is shaded entirely pink... it's not really pink; it is the masking color, which shows up as invisible during the game.
7. You probably won't want to do any actual editing in EditArt. It's really a pain in the butt. I use Paintshop Pro to do all of my editing... it's much easier. Save all of your files in the .GIF format... EditArt really doesn't like anything else. Also, save them to your Duke directory. It makes loading the images in much easier.
8. The best thing about EditArt is its import capability. Make a new tile, and size it to match the original image. Hit 'U', and you'll be presented with a list of image files in your Duke directory. Select your original, and hit ENTER. Note... sometimes EditArt will pick up a tile automatically and display it. If this happens, just hit ESC and you'll see the directory listing.
9. You'll see your full image, with a white-bordered box flashing around it. This is the actual size of your new tile, which should match your original image. Hit ENTER to load that image in.
10. Hit PgUp to select the next tile, it will ask you if you want to save the current tile. Hit 'Y' and you're done. Hit ESC then 'Y' in the main editing screen and it will update the corresponding .ART file. It is pretty standard policy among Duke Builders to put any custom art in TILES014.ART, which begins with tile #3584. You can distribute this file with your levels (named to something other than TILES014.ART,) just tell the players to rename any current TILES014.ART as a backup. Then rename your file to TILES014.ART and they're all set.
11. Most of the time, EditArt won't correctly import your image's "invisible", or masking color. If this happens, and your sprite has pink stuff all over it, you need to actually use EditArt to go in and change your tile. Find your tile, move the little pixel pointer (mouse works here, or the arrow keys) to any one of the pixels representing the color you wish to make masking. Hit BACKSPACE, which will select the masking color (the palette is down in the lower-right.) Then hit 'C', which will change all of the pixels matching the pixel color you have pointed-at to the color you have selected from the palette. To manually select a color, hold down shift and use the arrow keys to move around the palette.
12. To get the correct Duke palette for programs such as PaintShop Pro, find any original tile and hit F12. This will create a screenshot named CAPT000.PCX, which you can then load into your Paint program, and save the palette.
Animation:
To create animated sprites, place your tiles in sequence someplace in TILES014.ART. They must be together as a group in order for animation to work. For example, if you have a four-tile animation sequence, and you've placed the first tile at 3584, the last one must be 3587. Run EditArt and find the first tile you wish to animate. The first tile is the only tile which needs to be changed to allow animation. Leave the others alone. Hit the [-] key to cycle through the different animation options: NoAnimation, Oscillate, Forwards, and Backwards.
Once you've got the animation option you'd like, hit the [+] key to change the number of tiles in the animation sequence. This number must be one less than the total number of tiles. Hitting the [-] key here will decrement the number of tiles to animate until it reaches 0. Once it reaches 0, it will begin to change the animation type again. In our example here, because we have four tiles, the number must be set at 3.
If you want to test the animation out, hit the [A] key on your first tile. Pressing the [+] and [-] keys will change the animation speed. Once you have the proper speed set, press [ESC], then [PgUp]. It will ask you if you want to save the current tile. Hit [Y] to accept, or [N] to cancel.
That's about all you really need to know to get in and make your own art. I suggest highly that you use a separate paint program to make/edit your tiles. EditArt just isn't very powerful or friendly. You must use it to actually load and create the .ART files, but that should be it. Also, be careful when running EditArt and Build in another DOS box (if you run in Win95)... messing with the tiles can sometimes wreak havoc with Build.
Page written by: 
 |
Tutorial Pages
Bridges Cameras Conveyor Belts Cranes C-9 Crack Explosions Doors that Open Via a Switch Floor, Ceiling, and Split Doors Elevator Transport Earthquakes Glass Walls Light Switches Mirrors Pig Cop Recon Cars Platform Elevators Random Lights After Shot Out Rotating Sectors Sliding Doors Star Trek Doors (Split and Normal) Subways Swinging Doors Teleporters Two-Way Trains Up Open Door Lights Water Sectors
Plutonium Pak Only
Lightning Incremental Sector Raise/Lower
Using Build
Copying Sectors EditArt Basics Sectors Over Sectors |
Compiled by Shane King aka Scatt Man (scattman@ )
FORMAT OF THIS LIST
1 : sound number. Used in build
2 : sound name. This is the name that Duke Nukem uses internally to reference the sound
3 : .voc file name. The .voc files are stored in the duke3d.grp file
4 : min frequency adjustment
5 : max frequency adjustment
A random value between these two limits is chosen each time the sound is played
6 : priority If there are too many sounds to be played at once the higher (I think) priority sounds get played
7 : attributes
- bit 0 (%) Repeat
This sound will be played over and over
- bit 1 ($) Ambient Sound
This sound can be used as an ambient sound
- bit 2 (#) Duke Talk
This sound will follow the player
- bit 3 (@) Adult Mode
This sound will only be played if adult mode is on
- bit 4 (!) Random Ambient Sound
This sound can be used as a random ambient sound
8 : volume adjustment. Used to make the sound louder or softer
9 : sample rate (Khz). Multi means the .voc file has multiple blocks
10 : description of sound
A + in any section denotes that the section is not defined, hence following
sections are also not defined
- |
slim_pain | slimpn | 0 |
0 |
3 |
----- | 0 |
+ |
|
0 |
kick_hit | kickhit | 0 |
0 |
4 |
----- | 0 |
5.988 |
Duke's Mighty foot hits |
1 |
pistol_ricochet | ricochet | 0 |
0 |
0 |
----- | 4096 |
5.988 |
Pistol ricochet of solid object |
2 |
pistol_bodyhit | bulithit | 0 |
0 |
0 |
----- | 0 |
5.988 |
A bullit hits somebody |
3 |
pistol_fire | pistol | -64 |
0 |
254 |
----- | 0 |
5.988 |
Pistol firing |
4 |
eject_clip | clipout | 0 |
0 |
3 |
----- | 0 |
5.988 |
Duke ejects a used clip |
5 |
insert_clip | clipin | 512 |
512 |
3 |
----- | 0 |
5.988 |
Duke inserts a new clip |
6 |
chaingun_fire | chaingun | -204 |
-204 |
254 |
----- | 512 |
10.989 |
Chaingun firing |
7 |
rpg_shoot | rpgfire | -32 |
0 |
4 |
----- | 0 |
5.988 |
RPG Firing |
8 |
poolballhit | poolbal1 | 0 |
0 |
0 |
----- | 0 |
8 |
A poolball is hit |
9 |
rpg_explode | bombexpl | -1024 |
1024 |
254 |
----- | 0 |
multi |
A RPG rocket explodes |
10 |
cat_fire | catfire | 512 |
768 |
4 |
----- | 0 |
5.988 |
Freeze Ray Firing |
11 |
shrinker_fire | shrinker | -512 |
0 |
4 |
----- | 0 |
8 |
Shrinker Ray Firing |
12 |
actor_shrinking | shrink | 0 |
0 |
2 |
----- | 0 |
8 |
Somebody being shrunk |
13 |
pipebomb_bounce | pbombbnc | 0 |
0 |
2 |
----- | 6144 |
5.988 |
Tink of a pipe bomb bouncing |
14 |
pipebomb_explode | bombexpl | -512 |
0 |
128 |
----- | 0 |
multi |
A pipe bomb being detonated |
15 |
lasertrip_onwall | lsrbmbpt | 0 |
0 |
3 |
----- | 0 |
5.988 |
A laser trip bomb being placed on a wall |
16 |
lasertrip_arming | lsrbmbwn | 0 |
0 |
3 |
----- | 0 |
5.988 |
Beeeping of a laser trip bomb about to explode |
17 |
lasertrip_explode | bombexpl | -512 |
0 |
4 |
----- | 0 |
multi |
A laser trip bomb exploding |
18 |
vent_bust | ventbust | -32 |
32 |
2 |
----- | 0 |
5.988 |
Breaking a vent or fan |
19 |
glass_breaking | glass | -412 |
0 |
3 |
----- | 8192 |
8 |
Glass window being smashed |
20 |
glass_heavybreak | glashevy | -412 |
0 |
3 |
----- | 8192 |
11.025 |
Glass items being broken |
21 |
short_circuit | shorted | 0 |
0 |
0 |
----- | 6500 |
8 |
Duke gets an electric shock |
22 |
item_splash | splash | 0 |
0 |
2 |
----- | 0 |
multi |
Item dropped into water |
23 |
duke_breathing | hlminhal | 0 |
0 |
255 |
--#-- | 0 |
+ |
|
24 |
duke_exhaling | hlmexhal | 0 |
0 |
255 |
--#-- | 0 |
+ |
|
25 |
duke_gasp | gasp | 0 |
0 |
255 |
--#-- | 0 |
8 |
Duke catching breath after being under water |
26 |
slim_recog | slirec06 | 0 |
0 |
3 |
----- | 0 |
11.025 |
Green slime sights Duke |
27 |
endseqvol3snd1 | kickhead | 0 |
0 |
254 |
----- | 0 |
11.025 |
Duke kicks bosses head at goal |
28 |
duke_urinate | pissing | 0 |
0 |
4 |
----- | 0 |
5.988 |
Duke going to the toilet |
29 |
endseqvol3snd2 | gmeovr05 | 0 |
0 |
254 |
----- | 0 |
8 |
Duke "Game over" |
30 |
endseqvol3snd3 | cheer | 0 |
0 |
254 |
----- | 0 |
11.025 |
The crowd cheering Duke |
31 |
+ |
|
|||||||
32 |
duke_passwind | + |
|
||||||
33 |
duke_crack | waitin03 | 0 |
0 |
255 |
--#-- | 0 |
8 |
Duke "What are you waiting for, Christmas?" |
34 |
slim_attack | slimat | 0 |
0 |
3 |
----- | 0 |
11.025 |
Green Slime Attacking |
35 |
somethinghitforce | teleport | 0 |
0 |
2 |
----- | 8192 |
5.988 |
Something hitting a force field |
36 |
duke_drinking | drink18 | -128 |
128 |
2 |
--#-- | 0 |
11.025 |
Duke drinking water |
37 |
duke_killed1 | damn03 | 0 |
0 |
255 |
-@#-- | 0 |
8 |
Duke "Damn" |
38 |
duke_grunt | exert | 0 |
0 |
2 |
--#-- | 0 |
11.025 |
Duke - Uuugh |
39 |
duke_hartbeat | hartbeat | 0 |
0 |
0 |
----- | 0 |
5.988 |
Duke's heart beating |
40 |
duke_onwater | wetfeet | 0 |
0 |
4 |
----- | 0 |
11.025 |
Duke splashing through water |
41 |
duke_dead | dmdeath | -64 |
64 |
255 |
--#-- | 0 |
8 |
Duke's death scream |
42 |
duke_land | land02 | 0 |
0 |
2 |
----- | 0 |
8 |
Duke Landing on the ground (Not hurt) |
43 |
duke_walkinducts | ductwlk | -64 |
128 |
2 |
----- | 0 |
multi |
Duke walking in air ducts |
44 |
duke_glad | + |
|
||||||
45 |
duke_yes | yes | 0 |
0 |
255 |
--#-- | 0 |
+ |
|
46 |
duke_hehe | + |
|
||||||
47 |
duke_shucks | + |
|
||||||
48 |
duke_underwater | scuba | 0 |
0 |
2 |
----- | 0 |
multi |
Duke underwater with scuba |
49 |
duke_jetpack_on | jetpakon | 0 |
0 |
4 |
----- | 0 |
8 |
Duke turning jet pack on |
50 |
duke_jetpack_idle | jetpaki | 0 |
0 |
1 |
----- | 0 |
8 |
Duke with jet pack on |
51 |
duke_jetpack_off | jetpakof | 0 |
0 |
2 |
----- | 0 |
8 |
Duke turning jet pack off |
52 |
liztroop_growl | + |
|
||||||
53 |
liztroop_talk1 | + |
|
||||||
54 |
liztroop_talk2 | + |
|
||||||
55 |
liztroop_talk3 | + |
|
||||||
56 |
duketalktoboss | duknuk14 | 0 |
0 |
255 |
-@#-- | 0 |
8 |
Duke "I'm Duke Nukem and I'm coming to get the rest of you alien bastards" |
57 |
lizcapt_growl | + |
|
||||||
58 |
lizcapt_talk1 | + |
|
||||||
59 |
lizcapt_talk2 | + |
|
||||||
60 |
lizcapt_talk3 | + |
|
||||||
61 |
lizard_beg | chokn12 | 0 |
0 |
3 |
----- | 0 |
multi |
Alien shaking head when not quite dead |
62 |
lizard_pain | + |
|
||||||
63 |
lizard_death | + |
|
||||||
64 |
lizard_spit | lizspit | 0 |
0 |
0 |
----- | 0 |
8 |
Lizard spitting at Duke |
65 |
drone1_hissrattle | + |
|
||||||
66 |
drone1_hissscreech | + |
|
||||||
67 |
duke_tip2 | shake2a | 0 |
0 |
255 |
--#-- | 0 |
8 |
Duke "Shake it baby" |
68 |
flesh_burning | fire09 | -256 |
0 |
0 |
----- | 6100 |
multi |
Fire crackling |
69 |
squished | squish | 0 |
0 |
3 |
----- | 0 |
8 |
Someone is squished |
70 |
teleporter | teleport | 0 |
0 |
0 |
----- | 0 |
5.988 |
A teleporter is used |
71 |
elevator_on | gbelev01 | 0 |
0 |
0 |
----- | 0 |
8 |
Elevator is used |
72 |
duke_killed3 | thsuk13a | 0 |
0 |
255 |
-@#-- | 0 |
8 |
Duke "Uugh, this sucks" |
73 |
elevator_off | gbelev02 | 0 |
0 |
0 |
----- | 0 |
8 |
Elevator stopping |
74 |
door_operate1 | slidoor | -256 |
0 |
0 |
----- | 0 |
11.025 |
Metalic Sliding Door |
75 |
subway | subway | 0 |
0 |
0 |
----- | 0 |
multi |
A subway train |
76 |
switch_on | switch | 0 |
0 |
0 |
----- | 0 |
multi |
Click of a switch being used |
77 |
fan | fan | 0 |
0 |
0 |
----- | 0 |
+ |
|
78 |
duke_getweapon3 | groovy02 | 0 |
0 |
255 |
--#-- | 0 |
8 |
Duke "Groovy" |
79 |
flush_toilet | flush | 0 |
0 |
3 |
---$- | 0 |
multi |
Toilet being flushed |
80 |
hover_craft | hover | 0 |
0 |
0 |
----- | 0 |
+ |
|
81 |
earthquake | quake | 0 |
0 |
0 |
----- | 0 |
multi |
Earthquake rumble |
82 |
intruder_alert | alert | 0 |
0 |
0 |
----- | 0 |
5.988 |
Warning alarm |
83 |
end_of_level_warn | monitor | 0 |
0 |
0 |
----- | 0 |
8 |
End of level warning |
84 |
engine_operating | onboard | 0 |
0 |
0 |
---$- | 0 |
multi |
Low pitched grind of engine operation |
85 |
reactor_on | reactor | 0 |
0 |
0 |
---$- | 0 |
multi |
High pitched hum of reactor |
86 |
computer_ambience | compamb | 0 |
0 |
0 |
---$- | 0 |
11.025 |
Computer operation sound |
87 |
gears_grinding | geargrnd | 0 |
0 |
0 |
---$- | 0 |
5.988 |
Turning gears grinding together |
88 |
bubble_ambience | bubblamb | -256 |
0 |
0 |
---$- | 0 |
multi |
Water bubbling |
89 |
machine_ambience | machamb | 0 |
0 |
0 |
---$- | 0 |
11.025 |
Thumping of machine operating |
90 |
sewer_ambience | drip3 | 0 |
0 |
0 |
----- | 0 |
11.025 |
Drip into water |
91 |
wind_ambience | wind54 | 0 |
0 |
0 |
---$- | 0 |
multi |
Gust of wind |
92 |
something_dripping | drip3 | 0 |
0 |
0 |
----- | 9000 |
11.025 |
Loud drip |
93 |
steam_hissing | steamhis | 0 |
0 |
0 |
----% | 8192 |
8 |
Steam hissing from pipe or pot |
94 |
theater_breath | + |
|
||||||
95 |
bar_music | barmusic | 0 |
0 |
254 |
---$% | 0 |
11.025 |
Dance music in bar (as in bar in e1l2) |
96 |
bos1_roam | bos1rm | 0 |
0 |
3 |
----- | 0 |
11.025 |
Boss 1 screaming |
97 |
bos1_recog | bos1rg | 0 |
0 |
5 |
----- | 0 |
8 |
Boss 1 sees Duke |
98 |
bos1_attack1 | chaingun | 0 |
0 |
3 |
----- | 0 |
10.989 |
Boss 1 using chaingun |
99 |
bos1_pain | bos1pn | 0 |
0 |
3 |
----- | 0 |
8 |
Boss 1 in pain |
100 |
bos1_dying | bos1dy | 0 |
0 |
3 |
----- | 0 |
8 |
Boss 1 biting the dust |
101 |
bos2_roam | b2atk01 | 0 |
0 |
3 |
----- | 0 |
11.025 |
Boss 2 screaming |
102 |
bos2_recog | b2rec03 | 0 |
0 |
3 |
----- | 0 |
11.025 |
Boss 2 sees Duke |
103 |
bos2_attack | b2atk02 | 0 |
0 |
3 |
----- | 0 |
11.025 |
High pitched scream as boss 2 attacks |
104 |
bos2_pain | b2pain03 | 0 |
0 |
3 |
----- | 0 |
11.025 |
Boss 2 in pain |
105 |
bos2_dying | b2die03 | 0 |
0 |
3 |
----- | 0 |
11.025 |
Boss 2 dying |
106 |
getatomichealth | teleport | 2048 |
2048 |
255 |
----- | 0 |
5.988 |
Sound when Duke picks up a health atom |
107 |
duke_getweapon2 | getsom1a | 0 |
0 |
255 |
--#-- | 0 |
8 |
Duke "Come get some" |
108 |
bos3_dying | b3die03g | 0 |
0 |
3 |
----- | 0 |
11.025 |
Boss 3 Dying |
109 |
shotgun_fire | shotgun7 | 0 |
512 |
254 |
----- | 0 |
11.025 |
16bit, Shotgun blast |
110 |
pred_roam | roam06 | 0 |
0 |
3 |
----- | 0 |
multi |
Trooper sees Duke |
111 |
pred_recog | predrg | 0 |
0 |
3 |
----- | 0 |
multi |
Trooper sees Duke |
112 |
pred_attack | gblasr01 | 256 |
256 |
3 |
----- | 7680 |
8 |
Trooper fires at Duke |
113 |
pred_pain | predpn | 200 |
500 |
3 |
----- | 0 |
8 |
Trooper screaming in pain |
114 |
pred_dying | preddy | 0 |
400 |
3 |
----- | 0 |
multi |
Trooper dying |
115 |
capt_roam | predrm | 0 |
200 |
3 |
----- | 0 |
multi |
Lizard Captian roaming |
116 |
capt_attack | chaingun | 0 |
0 |
3 |
----- | -200 |
10.989 |
Lizard Captain attacking with chaingun |
117 |
capt_recog | predrg | -400 |
0 |
3 |
----- | 0 |
multi |
Lizard Captain sees player |
118 |
capt_pain | predpn | -200 |
100 |
3 |
----- | 0 |
8 |
Lizard Captain in pain |
119 |
capt_dying | preddy | -200 |
100 |
3 |
----- | 0 |
multi |
Lizard Captain dies |
120 |
pig_roam | roam29 | -200 |
400 |
3 |
----- | 0 |
multi |
Pig Cop roaming |
121 |
pig_recog | pigrg | -200 |
400 |
3 |
----- | 0 |
8 |
Pig Cop sees Duke |
122 |
pig_attack | shotgun7 | -256 |
256 |
4 |
----- | 0 |
11.025 |
16bit, Pig Cop fires shotgun |
123 |
pig_pain | pigpn | 100 |
800 |
3 |
----- | 0 |
8 |
Pig Cop grunts in pain |
124 |
pig_dying | pigdy | -800 |
100 |
3 |
----- | 0 |
8 |
Pig Cop death squeel |
125 |
reco_roam | jetpaki | 0 |
0 |
3 |
----- | 0 |
8 |
Recon Car Moving |
126 |
reco_recog | pigrg | 0 |
0 |
3 |
----- | 0 |
8 |
Recon Car sees Duke |
127 |
reco_attack | gblasr01 | 256 |
256 |
3 |
----- | 7680 |
8 |
Recon Car firing at Duke |
128 |
reco_pain | pigpn | 0 |
0 |
3 |
----- | 0 |
8 |
Recon car grunts in pain |
129 |
reco_dying | pigdy | 0 |
0 |
3 |
----- | 0 |
8 |
Recon Car Dies |
130 |
dron_roam | snakrm | 0 |
0 |
3 |
----- | 0 |
multi |
Drone roaming |
131 |
dron_recog | snakrg | 0 |
0 |
3 |
----- | 0 |
11.025 |
Drone sees Duke |
132 |
dron_attack1 | snakata | 0 |
0 |
3 |
----- | 0 |
11.025 |
High pitches zzzzz when drone attacks Duke |
133 |
dron_pain | snakpn | 0 |
0 |
3 |
----- | 0 |
11.025 |
Drone in Pain |
134 |
dron_dying | snakdy | 0 |
0 |
3 |
----- | 0 |
11.025 |
Growl when Drone dies |
135 |
comm_roam | commrm | 0 |
0 |
3 |
----- | 0 |
11.025 |
Fat commander roaming |
136 |
comm_recog | commrg | 0 |
0 |
3 |
----- | 0 |
11.025 |
Fat Commander sees Duke and says "Die Human" |
137 |
comm_attack | commat | 0 |
0 |
3 |
----- | 0 |
11.025 |
Fat Commander attacking and says "Suck it down" |
138 |
comm_pain | commpn | 0 |
0 |
3 |
----- | 0 |
11.025 |
Fat Commander in pain |
139 |
comm_dying | commdy | 0 |
0 |
3 |
----- | 0 |
11.025 |
Extended screem of commander dying |
140 |
octa_roam | octarm | -200 |
0 |
3 |
----- | 0 |
8 |
Octobrain roaming |
141 |
octa_recog | octarg | 0 |
0 |
3 |
----- | 0 |
8 |
Octobrain sees Duke |
142 |
octa_attack1 | octaat1 | 0 |
0 |
3 |
----- | 0 |
8 |
Octobrain firing at Duke |
143 |
octa_pain | octapn | -400 |
0 |
3 |
----- | 0 |
8 |
Octobrain screaming in pain |
144 |
octa_dying | octady | -400 |
-100 |
3 |
----- | 0 |
8 |
Octobrain dying |
145 |
turr_roam | turrrm | 0 |
0 |
3 |
----- | 0 |
+ |
|
146 |
turr_recog | turrrg | 0 |
0 |
3 |
----- | 0 |
+ |
|
147 |
turr_attack | turrat | 0 |
0 |
3 |
----- | 0 |
+ |
|
148 |
dumpster_move | grind | 0 |
0 |
0 |
----- | 0 |
11.025 |
Grinding wheels of dumpster |
149 |
slim_dying | slidie03 | 0 |
0 |
3 |
----- | 0 |
11.025 |
Green Slime dying |
150 |
bos3_roam | b3roam01 | 0 |
0 |
3 |
----- | 0 |
11.025 |
Boss 3 roaming |
151 |
bos3_recog | b3pain04 | 0 |
0 |
3 |
----- | 0 |
11.025 |
Boss 3 sees Duke |
152 |
bos3_attack1 | b3atk01 | 0 |
0 |
3 |
----- | 0 |
+ |
|
153 |
bos3_pain | b3rec03g | 0 |
0 |
3 |
----- | 0 |
11.025 |
Boss 3 in pain |
154 |
bos1_attack2 | rpgfire | 0 |
0 |
3 |
----- | 0 |
+ |
|
155 |
comm_spin | commsp | 0 |
0 |
3 |
----- | 0 |
11.025 |
Fat Commander spinning |
156 |
bos1_walk | thud | 0 |
0 |
3 |
----- | 0 |
multi |
Thump as Boss 1 walks |
157 |
dron_attack2 | snakatb | 0 |
0 |
3 |
----- | 0 |
11.025 |
Drone attacking |
158 |
thud | thud | 0 |
0 |
0 |
----- | 0 |
multi |
THUD! |
159 |
octa_attack2 | octaat2 | 0 |
600 |
3 |
----- | 0 |
multi |
Octobrain attacking with teeth |
160 |
wierdshot_fly | octaat1 | 0 |
0 |
3 |
----- | 0 |
8 |
Octobrain firing |
161 |
turr_pain | turrpn | 0 |
0 |
3 |
----- | 0 |
+ |
|
162 |
turr_dying | turrdy | 0 |
0 |
3 |
----- | 0 |
+ |
|
163 |
slim_roam | sliroa02 | 0 |
0 |
3 |
----- | 0 |
11.025 |
Green Slime roaming |
164 |
lady_scream | fscrm10 | -256 |
0 |
254 |
-@--- | 0 |
8 |
Woman screaming when hit |
165 |
door_operate2 | opendoor | -256 |
0 |
0 |
----- | 0 |
11.025 |
Swinging door |
166 |
door_operate3 | edoor10 | -256 |
0 |
0 |
----- | 0 |
11.025 |
Sliding door |
167 |
door_operate4 | edoor11 | -256 |
0 |
0 |
----- | 0 |
11.025 |
Sliding door |
168 |
borntobewildsnd | 2bwild | 0 |
0 |
254 |
---$- | 0 |
11.025 |
Born to be wild music |
169 |
shotgun_cock | shotgnck | 96 |
192 |
3 |
----- | 0 |
11.025 |
Shot gun being cocked |
170 |
generic_ambience1 | grind | 0 |
0 |
0 |
----% | 0 |
11.025 |
Grinding Sound |
171 |
generic_ambience2 | enghum | 0 |
0 |
0 |
---$- | 0 |
multi |
Engine humming |
172 |
generic_ambience3 | lava06 | 0 |
0 |
0 |
---$- | 0 |
8 |
Lava |
173 |
generic_ambience4 | bubblamb | -256 |
0 |
0 |
---$- | 0 |
multi |
Water bubbling |
174 |
generic_ambience5 | phonbusy | 0 |
0 |
0 |
----- | 0 |
11.025 |
Phone Engaged |
175 |
generic_ambience6 | roam22 | 0 |
0 |
0 |
---$- | 0 |
multi |
Octobrain like sound |
176 |
bos3_attack2 | + |
|
||||||
177 |
generic_ambience17 | myself3a | 0 |
0 |
255 |
--#-- | 0 |
8 |
Duke "Hmmm, don't have time to play with myself" |
178 |
generic_ambience18 | monolith | 0 |
0 |
0 |
---$- | 0 |
11.025 |
Wierd alien ambience |
179 |
generic_ambience19 | hydro50 | 0 |
0 |
0 |
---$- | 0 |
11.025 |
Water ambience |
180 |
generic_ambience20 | con03 | 0 |
0 |
0 |
--#-- | 0 |
11.025 |
Duke "Hmmm, looks like I have the con" |
181 |
generic_ambience21 | !prison | 0 |
0 |
255 |
--#-- | 0 |
multi |
Ha Ha Ha, too late Nukem, we're in control now |
182 |
generic_ambience22 | vpiss2 | 0 |
0 |
255 |
--#-- | 0 |
+ |
|
183 |
secretlevelsnd | secret | 0 |
0 |
255 |
----- | 0 |
11.025 |
Secret Level |
184 |
generic_ambience8 | amb81b | 0 |
0 |
0 |
---$- | 0 |
8 |
Far off alien ambience |
185 |
generic_ambience9 | roam98b | 0 |
0 |
0 |
---$- | 0 |
multi |
Muffled voice |
186 |
generic_ambience10 | h2orush2 | 0 |
0 |
0 |
---$% | 0 |
8 |
Water flowing |
187 |
generic_ambience11 | projrun | 0 |
0 |
0 |
---$% | 0 |
8 |
Movie Projector |
188 |
generic_ambience12 | blank | 0 |
0 |
0 |
----- | 0 |
5.988 |
A blank .voc file |
189 |
generic_ambience13 | pay02 | 0 |
0 |
255 |
-@#-- | 0 |
8 |
Duke "Damn, those alien bastards are going to pay for shooting up my ride" |
190 |
generic_ambience14 | onlyon03 | 0 |
0 |
255 |
--#-- | 0 |
8 |
Duke "What, there's only one of you?" |
191 |
+ |
|
|||||||
192 |
generic_ambience15 | rides09 | 0 |
0 |
255 |
--#-- | 0 |
8 |
Duke "I think I'll climb aboard" |
193 |
generic_ambience16 | doomed16 | 0 |
0 |
255 |
--#-- | 0 |
multi |
Duke "That's one doomed space marine" |
194 |
fire_crackle | fire09 | 0 |
0 |
254 |
---$- | 0 |
multi |
Fire crackling |
195 |
bonus_speech1 | letsrk03 | 0 |
0 |
255 |
--#-- | 0 |
8 |
Duke "Let's rock" |
196 |
bonus_speech2 | ready2a | 0 |
0 |
255 |
--#-- | 0 |
8 |
Duke "Ready for action" |
197 |
bonus_speech3 | ripem08 | 0 |
0 |
255 |
--#-- | 0 |
8 |
Duke "Rip 'ema new one" |
198 |
pig_capture_duke | !pig | 0 |
0 |
255 |
-@--- | 0 |
multi |
Got you now, you bastard, and we're gunna fry your arse |
199 |
bonus_speech4 | rockin02 | 0 |
0 |
255 |
--#-- | 0 |
8 |
Duke "Rockin'" |
200 |
duke_land_hurt | pain39 | 0 |
0 |
255 |
--#-- | 0 |
8 |
Duke landing from a height and hurting himself |
201 |
duke_hit_stripper1 | damnit04 | 0 |
0 |
255 |
-@#-- | 0 |
8 |
Duke "Damn it" |
202 |
duke_tip1 | dance01 | 0 |
0 |
255 |
--#-- | 0 |
8 |
Duke "You wanna dance?" |
203 |
duke_killed2 | damnit04 | 0 |
0 |
255 |
-@#-- | 0 |
8 |
Duke "Damn it" |
204 |
pred_roam2 | roam58 | 0 |
0 |
3 |
----- | 0 |
multi |
Trooper roaming |
205 |
pig_roam2 | roam67 | -200 |
400 |
3 |
----- | 0 |
8 |
Pig Cop roaming |
206 |
duke_getweapon1 | cool01 | 0 |
0 |
255 |
--#-- | 0 |
8 |
Duke "Cool" |
207 |
duke_search2 | whrsit05 | 0 |
0 |
255 |
--#-- | 0 |
8 |
Duke "Whare is it?" |
208 |
duke_crack2 | comeon02 | 0 |
0 |
255 |
--#-- | 0 |
8 |
Duke "Come on" |
209 |
duke_search | pain87 | 0 |
0 |
2 |
--#-- | 0 |
8 |
Umph, Duke pressing on walls |
210 |
duke_get | getitm19 | -64 |
64 |
255 |
----- | 0 |
8 |
Beep when Duke picks up an item |
211 |
duke_longterm_pain | gasps07 | -192 |
0 |
255 |
--#-- | 0 |
8 |
Duke gasping |
212 |
monitor_active | monitor | 0 |
0 |
0 |
----- | 0 |
8 |
Monitor beeping when changing camera |
213 |
nitevision_onoff | goggle12 | 0 |
0 |
0 |
----- | 0 |
multi |
Turn on or turn off night vision googles |
214 |
duke_hit_stripper2 | damn03 | 0 |
0 |
255 |
-@#-- | 0 |
8 |
Duke "Damn" |
215 |
duke_crack_first | knuckle | 0 |
0 |
3 |
----- | 0 |
multi |
Duke cracking his knuckles |
216 |
duke_usemedkit | ahh04 | 0 |
0 |
255 |
--#-- | 0 |
8 |
Ahhh |
217 |
duke_takepills | gulp01 | 0 |
0 |
255 |
--#-- | 0 |
8 |
Gulp when Duke uses steroids |
218 |
duke_pissrelief | ahmuch03 | 0 |
0 |
255 |
--#-- | 0 |
8 |
Duke "Ahhh, much better" |
219 |
select_weapon | wpnsel21 | 128 |
128 |
3 |
----- | 0 |
8 |
Changing weapon sound |
220 |
water_gurgle | h2ogrgl2 | 0 |
0 |
1 |
---$- | 9000 |
multi |
Water trickling |
221 |
duke_getweapon4 | wansom4a | 0 |
0 |
255 |
--#-- | 0 |
8 |
Duke "Who wants some?" |
222 |
jibbed_actor1 | amess06 | 0 |
0 |
255 |
--#-- | 0 |
8 |
Duke "What a mess" |
223 |
jibbed_actor2 | bitchn04 | 0 |
0 |
255 |
-@#-- | 0 |
8 |
Duke "Bitchin'" |
224 |
jibbed_actor3 | holycw01 | 0 |
0 |
255 |
--#-- | 0 |
8 |
Duke "Holy Cow" |
225 |
jibbed_actor4 | holysh02 | 0 |
0 |
255 |
-@#-- | 0 |
8 |
Duke "Holy Shit" |
226 |
jibbed_actor5 | imgood12 | 0 |
0 |
255 |
-@#-- | 0 |
8 |
Duke "Damn I'm good" |
227 |
jibbed_actor6 | piece02 | 0 |
0 |
255 |
--#-- | 0 |
8 |
Duke "Piece of cake" |
228 |
jibbed_actor7 | gothrt01 | 0 |
0 |
255 |
--#-- | 0 |
8 |
Duke "Ooow, that's gotta hurt" |
229 |
duke_gothealthatlow | needed03 | 0 |
0 |
255 |
--#-- | 0 |
8 |
Duke "Ooow, I needed that" |
230 |
bosstalktoduke | !boss | 0 |
0 |
255 |
----- | 0 |
multi |
Who the hell are you? |
231 |
war_ambience1 | waramb13 | -512 |
0 |
255 |
!---- | 0 |
5.988 |
Plane fly past |
232 |
war_ambience2 | waramb21 | -512 |
0 |
254 |
!---- | 0 |
5.988 |
Plane Crash |
233 |
war_ambience3 | waramb23 | -512 |
0 |
254 |
!---- | 0 |
5.988 |
Plane fly past |
234 |
war_ambience4 | waramb29 | -512 |
0 |
254 |
!---- | 0 |
5.988 |
Plane fly and alien scream |
235 |
war_ambience5 | force01 | 0 |
0 |
0 |
--#-- | 0 |
11.025 |
Duke "Now, this is a force to be reackoned with" |
236 |
war_ambience6 | quake06 | 0 |
0 |
0 |
--#-- | 0 |
11.025 |
Duke "I ain't afraid of no Quake" |
237 |
war_ambience7 | termin01 | 0 |
0 |
0 |
--#-- | 0 |
11.025 |
Duke "Terminated" |
238 |
war_ambience8 | born01 | 0 |
0 |
254 |
!--$- | 0 |
11.025 |
Duke "Born to be wild" |
239 |
war_ambience9 | nobody01 | 0 |
0 |
0 |
--#-- | 0 |
11.025 |
Duke "Nobody steals our chicks, and lives" |
240 |
war_ambience10 | chew05 | 0 |
0 |
0 |
-@#-- | 0 |
11.025 |
Duke "Its time to kick arse and chew bubble gum, and I'm all out of gum" |
241 |
alien_talk1 | mustdie | 0 |
0 |
255 |
-@#-- | 0 |
11.025 |
Duke Nukem must die |
242 |
alien_talk2 | defeated | 0 |
0 |
255 |
-@#-- | 0 |
11.025 |
Earth attack force defeated |
243 |
exitmenusound | item15 | 0 |
0 |
0 |
----- | 0 |
8 |
Exit menus |
244 |
fly_by | flyby | -256 |
256 |
3 |
----- | 0 |
multi |
Startup sound (at nuke symbol) |
245 |
duke_scream | dscrem04 | 0 |
0 |
255 |
----- | 0 |
8 |
Duke scream when he falls from a great height |
246 |
shrinker_hit | thud | 0 |
0 |
3 |
----- | 0 |
multi |
Shrinker ray hit wall |
247 |
ratty | mice3 | 0 |
0 |
0 |
----- | 0 |
11.025 |
Mice squeeking |
248 |
into_menu | bulithit | 1024 |
1024 |
0 |
----- | 0 |
5.988 |
Enter menus |
249 |
bonusmusic | bonus | 0 |
0 |
255 |
----% | 0 |
22.05 |
Music at end of level screen |
250 |
duke_booby | booby04 | 0 |
0 |
255 |
--#-- | 0 |
8 |
Duke "I should have known that those alien maggots booby trapped the sub" |
251 |
duke_talktobossfall | diesob03 | 0 |
0 |
255 |
-@#-- | 0 |
multi |
Duke "Die you son of a bitch" |
252 |
duke_lookintomirror | lookin01 | 0 |
0 |
255 |
-@#-- | 0 |
8 |
Duke "Damn, I'm lookin' good" |
253 |
pig_roam3 | pigrm | -200 |
400 |
3 |
----- | 0 |
8 |
Pig Cop roaming |
254 |
killme | killme | -128 |
0 |
0 |
----- | 0 |
11.025 |
Voice saying "Kill me" |
255 |
dron_jetsnd | enghum | 1300 |
1300 |
0 |
----- | 0 |
multi |
Engine humming |
256 |
space_door1 | hydro22 | 0 |
0 |
0 |
----- | 8192 |
11.025 |
Space door/elevator open/up |
257 |
space_door2 | hydro24 | 0 |
0 |
0 |
----- | 0 |
11.025 |
Space door/elevator close/down |
258 |
space_door3 | hydro27 | 0 |
0 |
0 |
----- | 8192 |
11.025 |
Space door/elevator open/up with stop |
259 |
space_door4 | hydro34 | 0 |
0 |
0 |
----- | 0 |
11.025 |
Space door open/close |
260 |
space_door5 | hydro40 | 0 |
0 |
0 |
----- | 0 |
11.025 |
Pressure release |
261 |
alien_elevator1 | hydro43 | 0 |
0 |
0 |
----- | 0 |
11.025 |
Noisy elevator |
262 |
vault_door | vault04 | 0 |
0 |
0 |
----- | 0 |
11.025 |
Slow moving door |
263 |
jibbed_actor13 | letgod01 | 0 |
0 |
255 |
--#-- | 0 |
11.025 |
Duke "Let God sort 'em out" |
264 |
duke_getweapon6 | hail01 | 0 |
0 |
255 |
--#-- | 0 |
11.025 |
Duke "Hail to the King baby" |
265 |
jibbed_actor8 | blowit01 | 0 |
0 |
255 |
-@#-- | 0 |
11.025 |
Duke "Blow it out your arse" |
266 |
jibbed_actor9 | eatsht01 | 0 |
0 |
255 |
-@#-- | 0 |
11.025 |
Duke "Eat shit and die" |
267 |
jibbed_actor10 | face01 | 0 |
0 |
255 |
-@#-- | 0 |
11.025 |
Duke "Your face, your arse, what's the difference?" |
268 |
jibbed_actor11 | inhell01 | 0 |
0 |
255 |
-@#-- | 0 |
11.025 |
Duke "See you in hell" |
269 |
jibbed_actor12 | sukit01 | 0 |
0 |
255 |
--#-- | 0 |
11.025 |
Duke "Suck it down" |
270 |
duke_killed4 | dscrem18 | 0 |
0 |
255 |
--#-- | 0 |
8 |
Duke strained scream |
271 |
duke_killed5 | pisses01 | 0 |
0 |
255 |
-@#-- | 0 |
11.025 |
Duke "This really pisses me off" |
272 |
alien_switch1 | aswtch23 | 0 |
0 |
0 |
----- | 0 |
11.025 |
Splat switch |
273 |
duke_steponfeces | happen01 | 0 |
0 |
0 |
-@#-- | 0 |
11.025 |
Duke "Shit happens" |
274 |
duke_longterm_pain2 | dscrem15 | 0 |
0 |
255 |
--#-- | 0 |
8 |
Medium length screem |
275 |
duke_longterm_pain3 | dscrem16 | 0 |
0 |
255 |
--#-- | 0 |
11.025 |
Short screem |
276 |
duke_longterm_pain4 | dscrem17 | 0 |
0 |
255 |
--#-- | 0 |
11.025 |
Even shorter screem |
277 |
companb2 | ctrlrm25 | 0 |
0 |
0 |
---$- | 0 |
11.025 |
Oscillating alien sound |
278 |
ktit | ktitx | 0 |
0 |
254 |
---$- | 0 |
8 |
Duke "This is KTIT, K tit. Bringing you the breast, I mean the best, tunes in town" |
279 |
helicop_idle | hlidle03 | 0 |
0 |
255 |
---$% | 0 |
5.988 |
Helicopter blades spinning |
280 |
stepnit | lizshit3 | 0 |
0 |
254 |
-@#-- | 0 |
11.025 |
Splat as Duke steps in it |
281 |
space_ambience1 | monolith | 0 |
0 |
0 |
!---- | 0 |
11.025 |
Wierd alienambience |
282 |
space_ambience2 | hydro50 | 0 |
0 |
0 |
!---- | 0 |
11.025 |
Grinding moving sound |
283 |
slim_hatch | slhtch01 | 0 |
0 |
3 |
----- | 0 |
11.025 |
Green slime hatching |
284 |
ripheadneck | rip01 | 0 |
0 |
254 |
-@#-- | 0 |
11.025 |
Duke "I'll rip your head off and shit down your neck" |
285 |
foundjones | jones04 | 0 |
0 |
0 |
--#-- | 0 |
11.025 |
Duke "We meet again, Dr Jones" |
286 |
alien_door1 | adoor1 | 0 |
0 |
0 |
----- | 0 |
11.025 |
Very noisy door |
287 |
alien_door2 | adoor2 | 0 |
0 |
0 |
----- | 0 |
11.025 |
Splatty door |
288 |
endseqvol3snd4 | grabbag | 0 |
0 |
254 |
----% | 0 |
11.025 |
Duke Nukem Title music |
289 |
endseqvol3snd5 | name01 | 0 |
0 |
250 |
----- | 0 |
8 |
Duke "My name's Duke Nukem" |
290 |
endseqvol3snd6 | r&r01 | 0 |
0 |
251 |
----- | 0 |
8 |
Duke "After a few days of R & R, I'll be ready for more action" |
291 |
endseqvol3snd7 | lani05 | 0 |
0 |
252 |
----- | 0 |
8 |
Lani "Ohh, come back to bed Duke" |
292 |
endseqvol3snd8 | lani08 | 0 |
0 |
253 |
----- | 0 |
8 |
Lani "I'm ready for some action now" |
293 |
endseqvol3snd9 | laniduk2 | 0 |
0 |
254 |
----- | 0 |
8 |
Lani & Duke make love |
294 |
whipyourass | whipyu01 | 0 |
0 |
255 |
--#-- | 0 |
8 |
Duke "It's down to you and me, you one eyed freak" |
295 |
endseqvol2snd1 | gunhit2 | 0 |
0 |
249 |
----- | 0 |
22.05 |
Gun hit |
296 |
endseqvol2snd2 | headrip3 | 0 |
0 |
250 |
----- | 0 |
11.025 |
16bit, Head ripped off |
297 |
endseqvol2snd3 | buckle | 0 |
0 |
251 |
----- | 0 |
22.05 |
Unbuckle jeans |
298 |
endseqvol2snd4 | jetp2 | 0 |
0 |
252 |
----- | 0 |
11.05 |
Throw off jetpack |
299 |
endseqvol2snd5 | zipper2 | 0 |
0 |
253 |
----- | 0 |
11.05 |
Undo zipper |
300 |
endseqvol2snd6 | news | 0 |
0 |
254 |
----- | 0 |
11.05 |
Open newspaper |
301 |
endseqvol2snd7 | whistle | 0 |
0 |
255 |
----- | 0 |
11.05 |
16bit, Whistle Duke Nukem theme |
302 |
generic_ambience23 | 2ride06 | 0 |
0 |
255 |
--#-- | 0 |
8 |
Freeze ray hit somebody |
303 |
somethingfroze | freeze | 0 |
0 |
3 |
----- | 0 |
22.05 |
Duke "Damn, that's the second time those alien bastards shot up my ride" |
304 |
duke_longterm_pain5 | pain54 | 0 |
0 |
255 |
--#-- | 0 |
8 |
Uww |
305 |
duke_longterm_pain6 | pain75 | 0 |
0 |
255 |
--#-- | 0 |
8 |
Ugh |
306 |
duke_longterm_pain7 | pain93 | 0 |
0 |
255 |
--#-- | 0 |
8 |
Oww |
307 |
duke_longterm_pain8 | pain68 | 0 |
0 |
255 |
--#-- | 0 |
8 |
Uuughh |
308 |
wind_repeat | wind54 | 0 |
0 |
0 |
---$% | 0 |
multi |
Repeating gust of wind |
Q. Im trying to run Build, but my screen is all full of junk, and the mouse trails echo all over the screen. Could it be my video card?
A. This is the number one problem I've been asked from first time users. You have to copy all of the files from the goodies\build directory of your CD to your main duke3d directory on your hard drive. Build looks in the current directory for the duke3d.grp file... which contains all of the art, sprites, etc.
Q. How do I make Sector Effectors? How do I change their HiTags/LoTags?
A. Sector Effectors are just another sprite, with the Sector Effector tile. All of the neat effects with Build are special sprites. The tile set is tile numbers 1 through 9. You've probably seen them a million times, but didn't know what they were for. A Sector Effector is tile number 1. To change its hi/lotag in 3d mode, point at the sprite, hold down the ['] key, and hit the [H] or [T] keys for Hitag/Lotag, respectively. To change the hi/lotag in 2d mode, point at the sprite, hold down [ALT], then hit the [H] or [T] keys for Hitag/Lotag, respectively.
Q. How do I make a sector inside a sector?
A. When you draw a sector inside another sector, it starts out with white walls (non- player space.) Press [ALT-S] on the inside sector to change it into valid player space (red walls.)
Q. My subways keep launching rockets at me! Help!
A. Take parallaxing off of the ceiling, this is the only known total fix. You can make the rockets not hit you by either "pushing" the SE-6 or SE-14 below the floor by a sizable amount or extend it through the ceiling. This will cause them to hit a void area, but you'll still hear the explosions.
Q. I put a sector within another sector then moved it against the wall... now I get really weird HOM when looking at it.
A. To make a "penisula" sector (ie a bookcase extending from the wall) simply split the existing white wall or insert two vertices along it. Then draw a new sector into the inner sector using those points as the starting and consequently ending points of your sector. Build does not like to have sectors moved on top of existing lines or vertices. This wreaks havoc with the engine.
Q. My framerate has made the game unplayable. What can I do to improve it?
A. Try the following to bring your frame rate back to Earth:
Reduce the number of unique sprites within any given area. Too many being loaded causes the engine to slow down when loading.
Dont use groups of sectors to make stairs. Use slopes instead. Too many sectors within any viewable area causes the engine when calculating the image Duke sees.
Avoid very large, expansive sectors. If the engine has to load too many sprites/tiles in any given image, the frame rate drops dramatically.
Cut down on the number of aliens in one area. Too many actors again will drop the FPS.
Avoid putting in lots of aliens that fire rockets. RPG really tax the engine.
Q. I've made my water sector, but I die when I either enter the water or try to exit. Both sectors are the same size.
A. The SE-7 sprites have to be in the exact same location on both water sectors, and at the same angle.
Q. Okay, my water sectors are identical, the sprites are in the same place, and pointing at the same angle. I can't enter the water or come out of it.
A. Make sure the ceilings/floors of both above-water and underwater sections don't have any slope to them. To clear the slope of a ceiling/floor, point at it in 3d mode and hit [/]. Also make sure the SE-7 sprites are placed on the floor. If you've put an island sector within your above water sector, that must be duplicated on the underwater section. Take a look at E1L3, the submarine level, and you'll see what I mean.
Q. I made a sprite with my paint program using the correct Duke palette, and imported it into EditArt. But when I use the sprite in Build, the "clear" space I had colored like the other masking sprites appears pink.
A. Load EditArt, find your tile, point at any one of the pixels that represent the color you'd like to make masking, and hit Backspace then [C]. Backspace turns your drawing color to the masking color, and [C] will turn any pixel matching the color of the current pixel (the one you have pointed at) to that drawing color.
Q. I've made a ceiling parallaxed, with the tile being Big Orbit. Every time I play the level, and walk into that room, I die. What's up?
A. The Big Orbit tile (and Moonsky) is meant to simulate actual space... ie no oxygen. Duke can't live without oxygen, man! You can avoid this dilemma by setting the ceiling palette to 3. Alt-P is the key command in 3d mode to change palettes.
Q. How do I change the palette of sprites/tiles?
A. This can be done only in 3d mode. Point at the sprite or tile and hit [ALT]-[P].
Q. I'm trying to slope my floor, but it's sloping at the wrong angle.
A. Build slopes to the first wall of a sector, making it the pivot point. To change the first wall property, you can either hit [ALT]-[F] in 2d mode when your cursor is over the sector to rotate the first wall over one, or hit [ALT]-[F] in 3d mode when pointing at the wall you wish to make the new pivot point. Be careful when using that in 3d mode, as you have to be pointing at a wall that is "inside" the sector. Think of it this way... pretend you're in a vertical cylinder, and you can only see the inner walls. Well, the same applies to the [ALT]-[F] key... you can only point at walls that are inside the sector.
Q. How do I copy sectors?
A. Check out my tutorial on copying sectors
Q. Can I copy sectors between maps?
A. Yes, you can. The target map has to exist first, however. You cannot copy a sector to a totally new map. To copy between maps, highlight the sector(s) you wish to copy with the right [ALT] key. Hit [ESC] to bring up the file menu. Hit [L] to load in your target map. The highlighted sector(s) will appear in the same spot as they were in your source map, so you may have to zoom out to find them.
Q. How do I make my weapons respawn?
A. Weapons respawn by themselves when you're playing a DukeMatch game with Respawning enabled. There is no way to have weapons respawn in Solo play.
Q. I load up EditArt, but all I get is a blank screen.
A. Make sure you've done these two things:
1. Copy all of the files from the goodies\build directory off of your CD to your Duke directory
2. Extract all of the art files from the .grp file by typing 'kextract duke3d.grp *.art' at the command prompt
If those two don't get you in, try running 'bsetup.exe' at the command prompt and change your video settings to 320x200 Standard VGA. This only affects the Build/EditArt engine, not your normal Duke games.
Q. I've made my first map, now how the heck do I play it?
A. There are two methods for playing user maps:
1. Type 'duke3d -map mylevel.map' at the command prompt
2. Run 'setup.exe' at the command prompt to bring you into the Duke setup screen. From here, you can select user maps. The command-line option allows you to select difficulty settings as well.
Q. I've made a door separating a small room with a larger, taller second room. When I open the door and let it close on my head, the door proceeds to go all the way to the ceiling of the larger room.
A. Insert a small sector in between your door and the larger room. Set its floor and ceiling to the same of your smaller sector, so that the door only has a single height to rise to.
Q. How do I make a door open via a switch, and only with that switch?
A. A special sprite, SE-32, will allow you to create a door that opens via an activator. Check out the Switch Doors tutorial.
Q. I've made a glass wall. When I play the level, and shoot the glass, the tiles on top get messed up.
A. Press [O] on the step tile (not the glass) to align it to the ceiling, instead of the floor. This should fix the problem. If you still have the problem, you can create a "buffer" sector in front of the glass wall so that the above and below tiles don't show.
Q. Ive made a Star Trek Door, but the darn thing wont open. When it tries, the tiles start to stretch, but the doors wont open.
A. Make sure the white lines of your inner doors are exactly on the red lines of the tagged sectors. If you've made two parts to the door, they must meet in the middle so that there's no gap.
Q. How do I change the angle of my camera?
A. The angle of the camera is set by the shade value of the sprite. Check out the Camera tutorial for a more thorough discussion.
Q. Ive made an animated sprite set, but it animates way too fast, or slow. How do I change the animation speed?
A. Run EditArt, change to the first tile of your animation set, and press the [A] key. The animation sequence should start animating. Use the -/+ keys on the keypad to change the speed of the animation. Once the desired speed is found, hit the [ENTER] key to confirm it. Change to a different tile using PgUp, and type [Y] when it asks if you want to save the current tile.
Q. How do I use access cards? How do I change them to red, or yellow?
A. The Access Switch (tile #130) is what the Access Cards (sprite #60) are used for. The palettes must match for the Card/Switch combo. The default for both is palette 0, or blue. To change them to yellow, change the palette of both card and switch to 23. To change them to red, change both to 21. To change a palette, use [ALT-P] in 3d mode.
Q. How do I make breakable vents?
A. Vents (tile #595) and Fans (tile #407) are blocked sprites, centered over a hole in a wall, and sized to match the opening. Use [B] in either 3d or 2d mode to make the sprite blocking (shows up purple in 2d mode.) To fixate your sprite horizontally, use the [R] key on it in 3d mode.
Q. How do I turn a forcefield on/off with a switch?
A. Change your switches lotag to a unique switch number. Change your forcefields wall to that same number. The easiest way to change a walls lotag is in 3d mode using the ['] [T] keyboard command while pointing at the wall.
Duke Nukem is ©1996 3dRealms Studios. It's their game, as is all of the Duke stuff. The intellectual property within this tutorial, however, is mine. Other contributing authors include Jean-Francois Groleau (jfgrol@ ), and he holds similar copyright to the pages he's created. 3dRealms does not support me, nor any of my tutorials. They don't support Build© or EditArt©, although they are terribly wonderful people for giving us these powerful tools. Support them with buying the game, if you have not already.
If you have any problems or questions with anything in this tutorial, ya gotta ask me (ty@ ), and I'll probably return your mail promptly. You can choose to support me in my ventures, or just use this tutorial and do kind things with it. If you are a developer, CD-rom compiler person, or anybody influential in a media-based distribution or storage of Duke-related property, please let me know before using any of the good stuff within this help file.
Thanks, and have a great one!
Ty Matthews (ty@ )
For the latest version of this Help file, check here:
http://

http://www.3drealms.com/